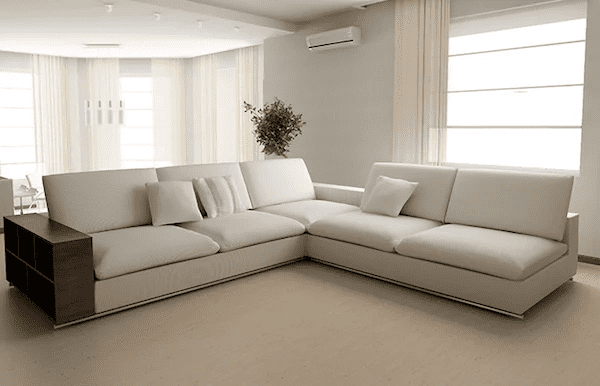
Painting walls in your house is a great way to spruce up your space. For this reason, it is helpful to know how to paint.
If you are a newbie, there’s absolutely no need to worry, as our guide below will show you how to professionally paint a wall.
What Should I Know Going Into a DIY Painting Project?
Painting projects are always fun—regardless of whether they’re Do It Yourself (DIY) projects or not. Good painting work will be admired for several following months.
However, there are among the following things you should consider before going to that job.
The first one is to have good tools.There is nothing wrong with splurging when getting the best paint brush or even painter’s tape.
You would in fact be saving more money in the long run, every time you use good tools.Less expensive tools will try to be better than they are at best.
This too would be better if only you also spend more time taping more areas that need to be covered from painting.Paint has a habit of getting everywhere.
To do it, it is recommended to eliminate all the things that are close to the wall that will be painted – for instance, furniture or a carpet.
Tools You Will Need To Paint A Wall
Here are few that you should have if painting your bedroom wall is your first do it yourself project. If you already own these tools, you don’t have to buy them again.
- Drop cloths or cardboard to catch any excess paint
- Primer
- Sanding machine
- Paint rollers
- Paint pads
- Paint tray
- Paint brushes (select between synthetic brushes and natural bristle brushes)
- Painter’s tape
- Your paint of choice
How To Professionally Paint a Wall
The following is a guide on how to restore and paint your whole wall.Ideally, by this point you should have decided which wall is to be painted.You should also make sure you know what kind of wall you are dealing with.
Choosing a specific space will provide one more time to prepare.
Here is how to paint a wall.
Step 1 – Prepping the surface
To start with, any switch and outlet cover should be unscrewed.This is in order to ensure the paint doesn’t get on them.
It is also to ensure that you get paint on every nook and cranny.Next put them in a plastic bag to avoid losing the screws when putting them away would be good to do so.

Next, move all the furniture away from the wall you want to paint. Then you then use plastic sheeting to cover them so that they do not get paint on them.
After that, look for holes and dents and use spackling paste to fill them.It’s advisable to use a putty knife while packing and spreading the paste.
Once it is dried, then come the moments of sanding.Using a sander on fine grit, buff out any excess paste.
You can then sand the paint on the wall and remove any paint that is on the wall. This time, work vertically and be sure to merge each stroked vertical line next to the other.
This will make sure you do not leave any place uncovered. As for such sanding, it will also provide a highly even removal.
On sanding, you should not be very aggressive with the surface since this can cause additional damage. Excessive pressure will just make the sandpaper less usable and it will not do the job it should do.
Step 2 – Use Painters Tape
Once you are preparing the wall surface and stripping up any residual paint it is beneficial to use painter’s tape to decide on the extent of the areas that aren’t to be painted.
Then, use your putty knife to ensure that the tape binds with the wall surface well, or extremely well.

When working with painter’s tape then you have a no issue with the paint dripping or bleeding through.But if you try to use any other kind of tape, for instance, masking tape, you’ll never get clean lines.
Original painters tape can remain on your wall well over a week and still come off cleanly.
Step 3 – Priming
Wiping it with a damp cloth is mandatory before applying a primer on the wall. This will absorb any dust. This also means that no dust particle will be allowed to dry on the paint.
The next process requires use of primer given it will give good and smooth surface on which the coat of paint will be applied.Remember that if you want to achieve professional results you should use a tinting primer.

Why? Remember all the gaps that you have concealed?They will glare out of the paint job, and you’re supposed to use a tinted primer.
You can always add a little paint of the finish paint if needed just add a little more of that finish painting.This will cause one to see the finishing color to stand out from the other part of the wooden piece.Another factor is that you know you might be able to get fewer coats of painting.
It will also give you an amazing and smooth finish with every coat of paint.
Step 4 – Use Paint Additives
Most paints nowadays are fast-drying, in fact, they dry much too quickly than even purported professional painters might prefer.Therefore, to work with such paint is quite challenging.
If additives like Penetrol are incorporated into the paint then the rate at which they dry is slowed down.

This will make it much easier to apply paint since you will have more time to correct the wrong doings.It is important to correct most of the paint errors when the paint is still wet.
The two cause dies out: lap marks and brush strokes on the wall surface.There’s still time to add those easy touches, so pour a few ounces of Penetrol into half a pint of paint and mix around.
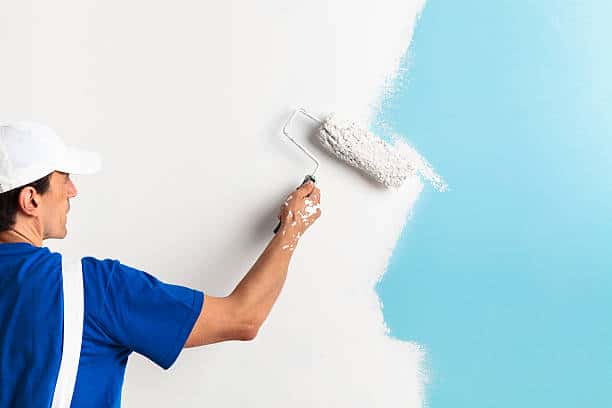
Step 5 – Painting
You have to use the correct brush.Another advantage of using a good paintbrush is that you will closely control them allowing you paint as a professional.This is because a cheap brush will shed much material onto the wall leaving behind an uneven surface.
You will also require roller covers together with an extension pole in that it help you to reach those upper parts of the wall and reduce back strain.

In most times, do not estimate the amount of paint you require before buying paint, ask a professional painter to give you an estimate. After you get the estimation for one wall, enclose your paint.
Boxing paint means that you start with putting all your paint in a larger container. This helps get you an even finish with each of the coatings. Furthermore, it should be enough for one or two coats of paint at least, preferably three.
One more coat is applied after going in to the space with one color of paint. However, make sure you paint from top to bottom.
Pro tip: When using the roller, paint your wall in the form of “W”. This means that you will have even layers of the same color in case you apply many layers on the wall.
Factors To Consider Before Painting a Wall
There is something you want to learn before you go off and start painting your interior walls.
1) Performance Over Price
Quality paint and quality brushes will always do a great job, but be prepared for the process to take some time! It may cost a little extra to buy all the paint and brushes, but your painting will be for years to come.
But if you decide to go with the cheaper type, you’ll probably have to repaint within a few months.

If you paint just one side of a room, then you have the whole room a fresh look. At other times, just painting one wall of a room can help to create an illusion of space in the room.
2) Painting Techniques
You need to thumbs down a painting schedule before you go for the next painting. The first thing which you may do is painting the wall from the top to the bottom.

For instance if it is an accent wall of a bright color then begin by painting the other walls with the basic or primary colors.That means, whatever light color paint goes on to the accent wall, will in one way or another be disguised with dark paint.
Also remember, if you are painting your wall you should use primer and two coat paint if you are painting dark walls. It also helps that the original color is not coming out while the second layer helps set the tint more firmly.
3) Time And Labor
Painting takes a significant amount of time. Preparing a wall takes more than 30% to 50% of the total time for the activity. Most paint jobs fail due to lack of preparation.

Failure to do the preparatory part means your painting won’t last as expected. For their part, pro painters were most insistent about repairing and spackling any cracks and holes before getting the first layer of paint or primer, as the case may be. All this takes a long time to do.
The time that you shall be using for the next painting of your project is time that you shall be using away from other activities. In addition, your painting abilities will be subjected into a test.
As such you may require support from friends or at times relatives in the process of evacuating. Any time and effort you are willing to invest on painting should be taken into consideration when painting a room or a wall.
4) Type of House You Have
There are modern houses, and there are older houses. It is important to remember that the two houses do require different things.
For instance, the production of paint for older houses differs with that for newly developed houses.

For starters, most of the older houses contain leads paints, especially if the house was constructed before 1978.But in case you want to paint any wall in your older house, then talk to a professional painter first.
Modern homes also contain high ceilings and domes at times. There are some projects on which you may need a professional painter and decorator, if you do not want or cannot do the job yourself.
So, hence, this calls for prior research before you engage in any painting endeavors.
5) Costs
But of course you still have to decide upon working out costs. With every home project, therefore, there will be other associated costs.
However, it is important for you to understand the above considerations before you dare venture into the do it yourself era plan your budget carefully though you may only be estimating an approximate figure.

It will be much costly if you find your self having to go back to square one and have to purchase all new equipment and materials.
You may not spend as much, if you already have some good quality equipment.It may also be desirable to buy the best equipment and items too.Finally it will be significantly cheaper.
Frequently Asked Questions (FAQ)
i) How Do Professional Painters Get Straight Lines?
Most professional painters understand one crucial fact that there is no single method how to get the straight lines. Of course, various painters work in various ways. On any paint job, you will commonly use painter’s tape so that you get a perfect line at the edge.
Secondly, there are some painters that use an edging tool also referred to as the painter’s shield in order to get sharp and straight lines. On the other hand, other painters apply paint using a brush with an angle towards the surface they are painting, and very carefully.
But it’s about finding out a technique that suits you.
ii) How Many Coats of Paint Should I Put on My Wall?
In most cases, you are likely to find that two bids are enough to provide a good appearance. But that does not apply to darker tone paints. It will take three drawings of painting to obtain a perfect color finish especially when using dark colorant.
That is true but we also think it could be due to the fact that two coats maybe usual but depends on which surface you are painting. Of course the quality of the paint does count, and whether or not you have used a primer.
If you have followed strictly the instructions which are highlighted in the above section, you should be alright with two coatings.
iii) In what Order Should I Paint My Wall?
Professional painters usually paint the trim of areas such as windows, then the ceiling, then the wall.
In our case, since you are painting only one wall then it is advisable to move from the trim to the wall.
This method is easier because it makes much more sense to place and remove the tape on the trim than applying the tape to the wall in its entirety.
iv) Can I Paint My Wall in One Day?
This depends on if you prepped or did not prepping as a farmer sometimes depend with circumstance or event on the ground.It also depends on the number of paint which is desired to be given and the kind of paint you has to choose from.
Original paints literally take up to 6 hours to dry while the newer ones can dry in around 45 minutes.
You could paint your wall in a day, depending on the fact that you had been sparing sometime and allowed primer to dry. If you combine prepping and applying the primer, then you should take a minimum of two days for the process.
v) Can I Paint Over Old Paint?
Yes, you can. There is no special method to painting however, there are some regulations too to paint over the old paint. Firstly, it must be stressed that the wall has to be fairly healthy. The color of the paint can absolutely not be wrong. Cracks and dents should not be on the wall or paint.
More so, only then can you add another layer of primer and follow that up by adding two other coats of new paint. Besides, if the prior painted surface was a latex paint, then the current painted surface should also be a latex paint.
Just a word of caution if you are using a dark color then you may need to make a second application.