DIY projects can be many things. Simply put, it’s a project you complete at most if not every stage, by yourself. Most often, it’s applied to projects around your home. This is where our interest lies, too.
There are clear camps of those who want to pay experts to complete all aspects of a project and those who want to handle all aspects themselves—a full do-it-yourself job. In reality, of course, there has to be a fine balance. Most of us can’t pay for it all. Most of us can’t do it all. As a result, homeowners need to know some basic practical skills and basic tools, from glue to screwdrivers.
Whether you need to tighten a loose door handle or grease a squeaky drawer, these skills will prove invaluable time and time again. You don’t necessarily need to pick and choose what projects you apply these skills to. It’s about being flexible and realistic and getting the job done as you see fit.
What is a DIY project?
Remember, DIY comprises many factors, including projects and ideas, more so in your house and dwelling place. A home based DIY project could just be as mundane as obtaining fabric and sewing it to make a new table cloth. It could be something more elaborate like constructing a table for the table cloth. It can be as basic as replacing knobs on cabinet doors with another kind of knobs or handles. It could be more complex, like turning a piece of furniture into a new one and then applying a new layer of spray paint on it.
Image Source: sanook.com
What’s good, though, is that each skill and tool you acquire can be reused. What you learn to complete a first, easy project can be used when repairing things down the line. It will all help you save money, too.
Home improvement is a constant state of evolving vision, finding creative ways to insert yourself in your home throughout your life. You will always find more examples of projects you could undertake; always find more ideas.
12 DIY Projects to Transform Your Home
1. Create a Gallery Wall.
A gallery wall is an appealing way to display your favorite photos, prints, and art pieces. Besides, adding a personal touch and making a statement is inexpensive.

Image Source: spacejoy.com
- Measure the space on the wall space where you plan to create the gallery.
- Collect your photos, art pieces, and prints.
- Arrange the layout on the floor.
- Prepare the wall by cleaning it.
- Hang the frames.
- Once the frames are securely hung, add your photos, prints, and art pieces into the frames.
Let us not forget that the spacing between frames whether in the vertical or the horizontal direction has to be right. Furthermore, feel free to change the position of photos and pieces of art in order to achieve the visual design you prefer. Design and enjoy your perfect gallery wall, inspired by the tips and ideas of professionals and enthusiasts alike!
2. Build a Raised Garden or Herb Bed.
A raised garden or herb bed makes growing veggies, herbs, and flowers easy on your back and knees because you don’t have to bend to the ground when working in the garden. Choose a spot and measure out the size and shape of your raised bed. For instance, 3 feet wide and 12 to 20 inches high.
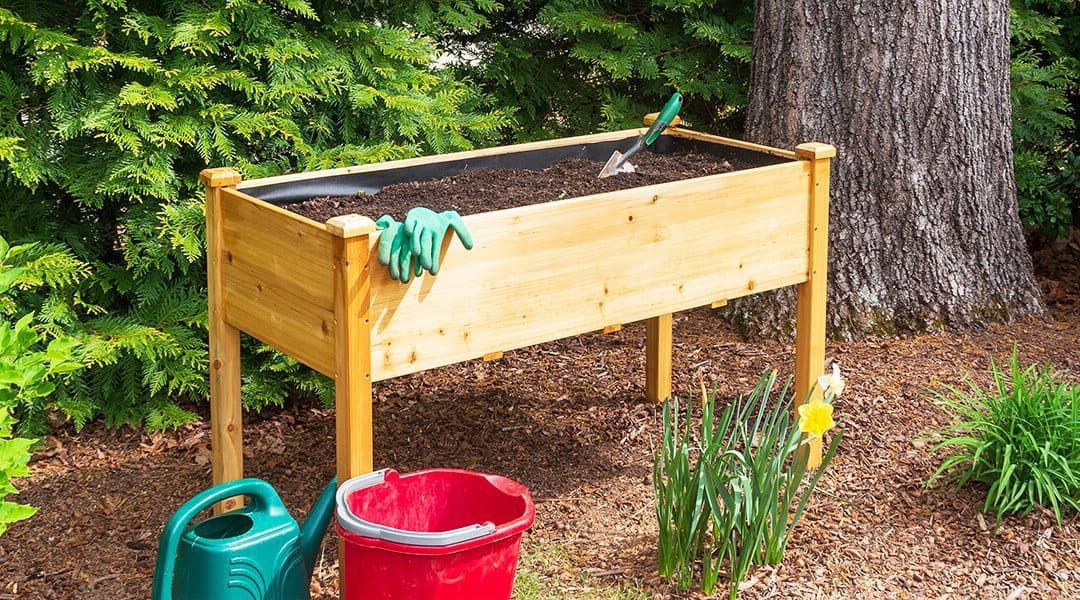
Image Source: platthillnursery.com
- Use water-resistant materials like landscape timers, concrete blocks, or rot-resistant wood to build one yourself, or buy a raised bed kit.
- Use screws to secure the corners.
- Put in quality soil by mixing two parts topsoil with one part compost or buying a commercial mix specifically made for raised beds.
- After planting, mulch the beds to maintain moisture; above-ground beds usually lose moisture faster than in-ground gardens.
3. Build a Shelf
The installation of a shelf is another easy upgrade relevant to functional and ornamented shelving storage. Determine where you want a shelf and how large it must be. We suggest fixing the supports to one of the wall studs as Stronger alternatives include using the screws that come with the drywall anchors if you do not plan to place a lot of weight on the shelf. Besides, brackets can be added to accommodate heavy loads or longer shelves as per required in certain homes.

Image Source: capitalfm.co.ke
- Measure the desired height and the space between each bracket.
- Drilling pilot holes prevents the screws from stripping out the brackets’ holes.
- Attach the shelves to the brackets.
- Test the strength of the shelves before putting anything fragile on them.
4. Wallpapering a Wall
Using wallpaper instead of paint is an excellent manner to add pattern and color to a room in an energizing way. It comes in a wide range of materials, permitting you to personalize the look and feel of your space. Nowadays, prepasted papers make do-it-yourself decor easier to apply.

Image Source: designcafe.com
- Measure the wall`s height and width and multiply the measurements to calculate the square footage of the wall.
- You can subtract 10 square feet for the door or large window.
- If the wallpaper has a pattern, we recommend purchasing an extra roll or two of the same dye lot, based on the size of the pattern.
5. Interior Lighting Upgrade
Add some creativity to your home’s interior by playing with light. The three functions of lighting are usually general, task, and accent. For instance, undercabinet lighting can enhance safety issues for food preparation, improve ambiance, show off backsplash tile, or serve as a nightlight for early morning trips to the kitchen.

Image Source: nobroker.in
Use statuesque lights in the shape of animals as accent lighting, or use ordinary items (such as teapots or old telephones) by converting them into lights. Besides, draping a few rows of string lights, such as these indoor/outdoor fairy lights, from the ceiling can create a romantic atmosphere.
6. Reupholster Old Furniture.
Old furniture typically comes with fine detail work, but the fabric may be old otherwise. Reupholstering a piece of furniture brings that piece a new functionality. The simplest kind of chair seat is really not difficult to restore.
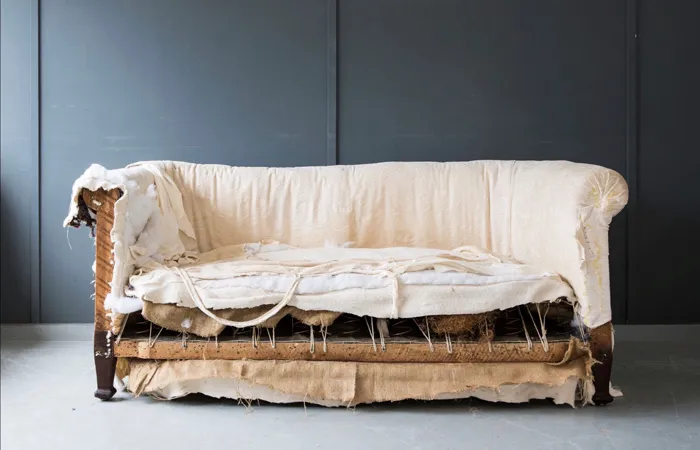
Image Source: vintiqueupholstery.com
- Measure the cushion to discover how much fabric is required; you’ll need a few extra inches on both sides to fold over the bottom of the seat.
- Take the seat out of the chair.
- If you want to make any repairs, refinish the chair, or add new padding, it’s time to do it.
- Cut out the fabric to fit.
- Fold it over the seat and staple it to the underside of the seat.
- Pull it taut and finish up all the sides.
- Angle the fabric on the corners before stapling.
- After that, reattach it to the chair for a fresh appearance.
7. Fix Your Sidewalk or Driveway.
Sidewalk and driveway cracks and gaps can quickly widen over a year. A patch job will make your pathway look nice and enhance the safety and functionality of your outdoor space.
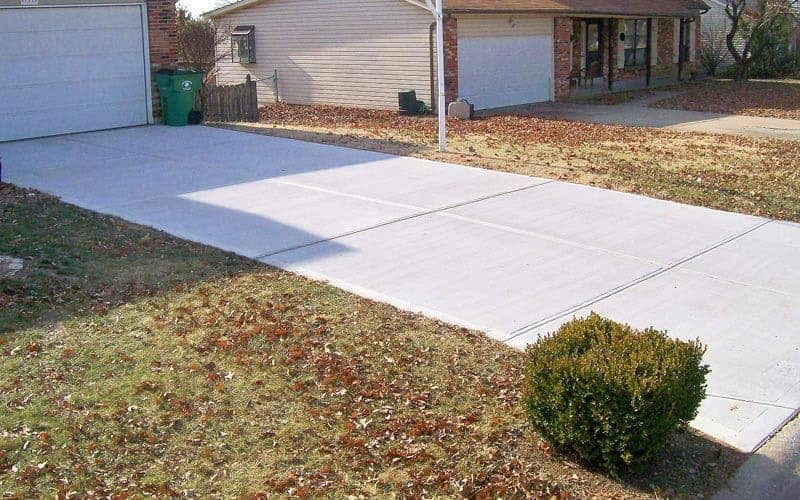
Image Source: shamrockconcretellc.com
- Assess the damage: Examine the condition of your driveway or sidewalk to determine how severe the damage is.
- Prepare the area by clearing any vegetation, debris, or loose materials.
- Fill the potholes and cracks. We recommend using a concrete crack filler or patching compound for small cracks.
- Resurface or repave: You may need to resurface or repave the sidewalk or driveway if the damage is significant or the whole surface needs improvement.
- Mix and pour concrete. If you need to pour new concrete for do-it-yourself repairs, we recommend following the instructions on the bag of concrete mix.
- Cure and protect: Allow the fixed area to cure according to the recommended time on the concrete mix.
- Apply a sealant: Once the spot has completely cured, apply a sealant or concrete finish.
8. Swap Your Door Handles.
Replacing your door knobs proves to be an easy and cheap way of altering the appearance of your house quite much. It has been immense pleasure to complete the process and see your doors looking new!
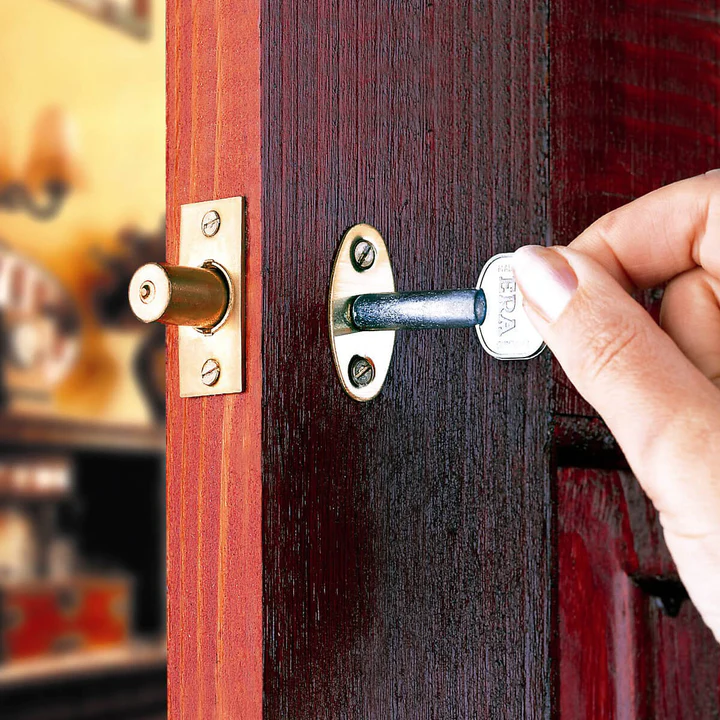
Image Source: schlage.com
- Gather the necessary tools.
- Choose new door handles that match your desired finish and style.
- Take out the old door handles and any additional hardware attached to the door.
- Install the new door handles. First, on the inside door, repeat the process with the other handle on the exterior side of the door.
- Install any extra hardware.
- Test the door handles by closing and opening the door multiple times to ensure that the handles operate smoothly and the latch is secure.
- Repeat the same process for other doors if you are replacing multiple door handles.
9. Build a Deck
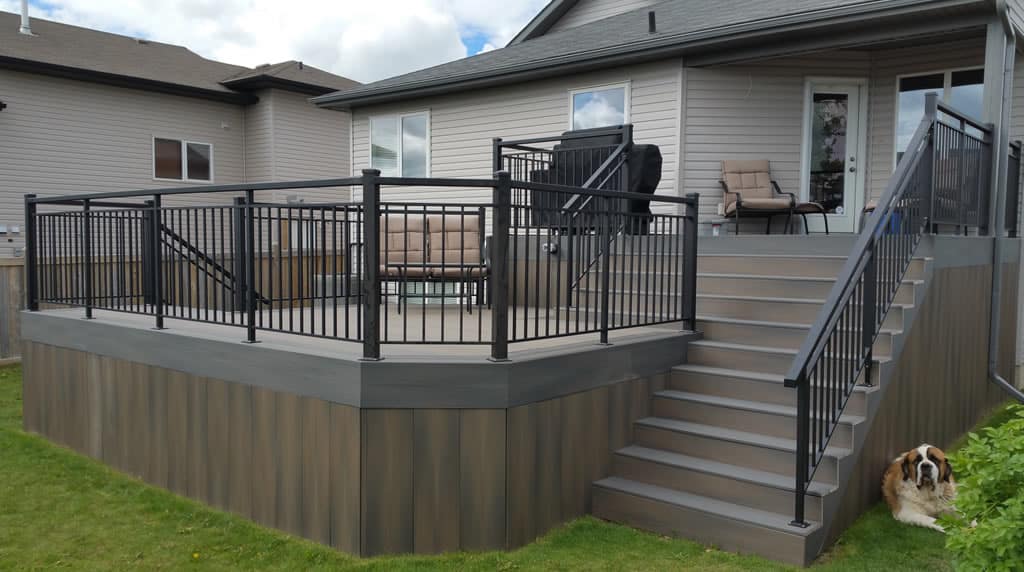
Image Source: natessundecks.com
- Determine the size and location: When determining the size and location to build the deck, keep these factors in mind: accessibility, sunlight, and the existing layout of your outdoor space.
- Create a deck design that fits your needs and preferences.
- Gather materials and the necessary tools.
- Prepare the project site by clearing the area of any debris, rocks, or vegetation.
- Install footings by digging holes for the deck footings according to local building codes and guidelines.
- Build the frame using pressure-treated lumber.
- Start installing the deck’s outer edges, working your way inward.
- Install railing posts and balusters to provide safety and support.
- To protect and improve the aesthetics of your deck, apply a weather-resistant finish or paint.
- Examine the completed deck for uneven surfaces, loose fasteners, or potential safety hazards.
10. Replace a Faucet
You can change a faucet yourself if it has sprung a leak or if you want to upgrade the design to accessorize your décor. This will be simple if your replacement faucet has the similar hole layout. However, you can switch from a three-hole faucet to a one-hole faucet by installing an escutcheon plate that covers the other two holes.

Image Source: ebay.com
- Start by turning the water off, often done under the sink by twisting a knob.
- Lift the faucet out by loosening the bolts on it.
- After that, install the new faucet and escutcheon plate, fasten the nuts, and join the necessary water lines (if applicable).
- You may need to caulk if you are using an escutcheon plate.
11. Add a Backsplash
You can improve the aesthetic of your kitchen or bathroom by adding a stylish backsplash. The goodness is that there are many options available, such as peel-and-stick tiles.
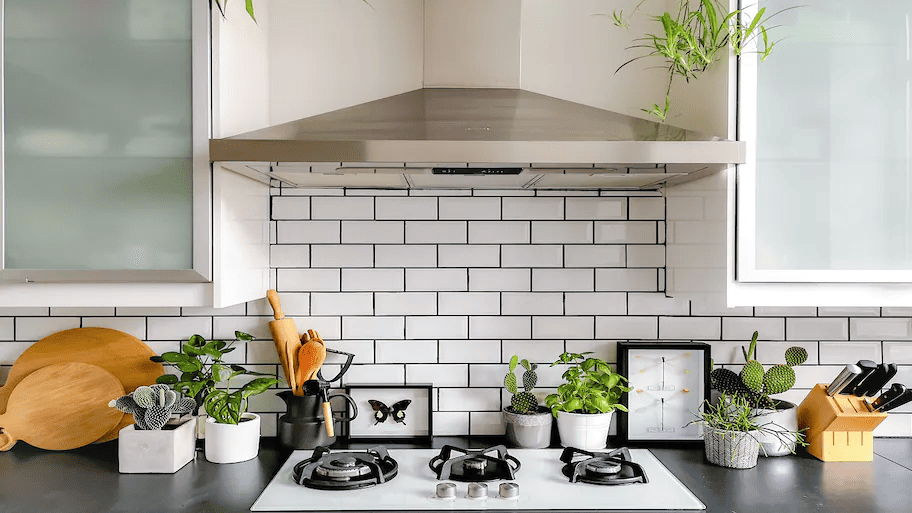
Image Source: angi.com
- Prepare your layout: Choose the type of backsplash material you want, like glass tiles, porcelain tiles, subway tiles, or peel-and-stick options.
- Measure the height and length of the area you intend to add the backsplash.
- Clean the wall surface thoroughly before installing the backsplash to ensure proper adhesion.
- Get the necessary materials and tools. You will need the backsplash material, a trowel, a tile cutter or wet saw, spacers, grout, adhesive or mortar, and sponges for cleaning.
- Use a tile cutter or wet saw if your backsplash needs tiles cut to fit around corners, outlets, or edges.
- Apply adhesive or mortar as recommended by the manufacturer.
- Install the tiles by pressing them firmly into the adhesive or mortar and leaving no gaps between them using spacers. Be patient and build up the backsplash in stages.
- Apply grout: We recommend mixing the grout according to the manufacturer’s instructions.
- Clean and seal the grout: Once the grout has been partially cured, wipe any grout haze from the tiles with a clean sponge and water.
12. Install a New Front Door.
Replacing your front door can enhance the appearance of your house, security and may also affect energy efficiency of the house. Our suggestion is to choose the design and colors that will blend with the exterior of your home.
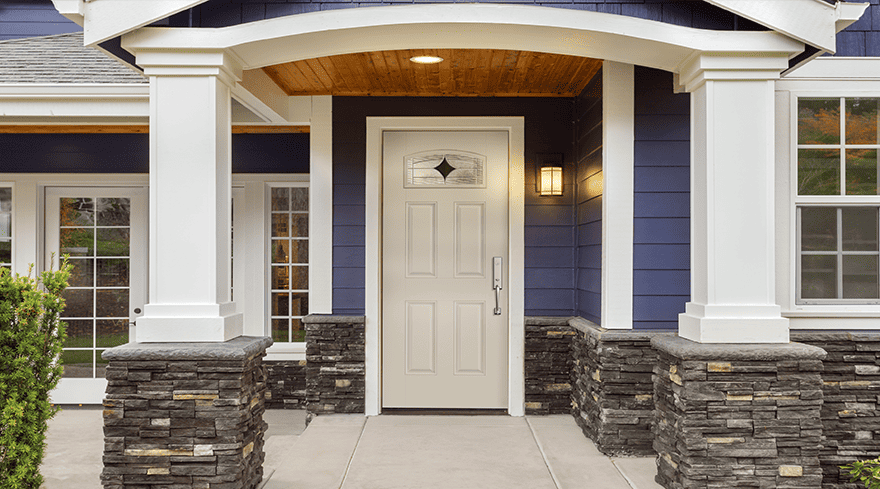
Image Source: pella.com
- Measure the door frame’s height, width, and thickness to know the size of the new door you plan to install.
- Get the necessary materials and tools. You will require a drill, tape measure, screws, screwdriver set, level, a pry bar, and shims.
- Carefully remove the old door using a pry bar.
- Prepare the door frame and ensure it has no damage.
- Install the new door and ensure its level and plumb. Also, ensure it is working properly and make adjustments if needed.
- Apply weatherstripping or insulation around the new door to increase energy efficiency and weatherproofing.
- Attach the deadbolt, doorknob, and other hardware according to the manufacturer’s instructions. Also, ensure proper functionality and alignment.
- Open and close the installed door multiple times to ensure proper alignment and smooth operation.
- Paint the door color scheme preference or the manufacturer’s instructions (if needed).
What to Know Before Attempting Your First DIY Project
Those who want to push their abilities a little further—fulfill their interior design ideas and do-it-yourself skills—may begin to explore the world of do-it-yourself. DIY home projects can be relatively simple, such as hanging a hollow-core door, or complex, such as renovating an entire room. Whatever DIY projects you are tackling, there are some basic principles you need to be aware of before tackling your first task. Read on to find out more.

Image Source: sofi.com
1. Get the Right Equipment.
Get all the necessary equipment before kickstarting your first DIY project. The things you need depend on your job; you may only need some paintbrushes or serious builder supplies. The right project tools are essential so that you can do it yourself.
Having reliable tools on hand will prove invaluable later for every project you undertake. Even if you don’t need a table saw or a set of screwdrivers—whatever tools—for your first DIY projects, you should aim to pick them up aimmediately, as they will undoubtedly come in handy.
2. Plan Everything Thoroughly.
When it comes to DIY home projects, planning, and preparation are everything. Think carefully about the task before you proceed, and have a clear plan for each stage of the process. Remember to take lots of measurements; a spirit level is a handy tool to ensure nothing gets installed squinty or lopsided.
Go slowly; there’s no need to rush your first projects. Take regular breaks to assess your progress and ensure everything goes according to plan.
3. Prioritize Your Safety.
Many DIY project involves use of sharp items/objects and therefore they can be dangerous. If you will not notice the things around you, it can leads to accidentally injuring yourself. It’s always wise to exercise care when working with any sharp object around you. If possible, wear thick protective gloves so that hands will remain protected from cuts as well.

Image Source: lookdigitalsignage.com
Small debris and shrapnel can fly everywhere if you are sawing or drilling. Maybe towards precious knick-knacks on compact shelving, but if one were to accidentally hit you in the eye, it could cause serious damage. Always wear protective goggles to prevent this from happening.
If you’re painting, wear a mask and ensure the space is well-ventilated by keeping windows open. This will reduce the chance of you breathing in the harmful fumes that paint can give off.
If you’re changing the taps on your sink, make sure you turn off the water. Flooding can be disastrous—though a good excuse for more DIY projects—but it will not help you save money!
Kids will enjoy helping you do it yourself. Their enthusiasm can be infectious. But, as anyone with kids knows, you will have to channel that. They greatly help get two coats of paint on the walls. However, while the walls aren’t necessarily dangerous, things in front of them might be hazardous. Don’t have them stand on a chair to reach the higher sections. Ensure the floor is clear of tripping hazards (something that’s easy to neglect when in the throes of having tools, paint, and tasks everywhere).
Sensitive tools like glue are best kept out of the way of kids. But the truth is, having your kids invest themselves in your DIY projects—be it painting walls, varnishing chairs, or mopping floors after a project is done—will help them form emotional ties to the place they live. You will give your kids memories.
4. Know When to Call in a Professional for Certain Projects.
If you’ve decided to tackle your first DIY project, your best bet is to pick an easy DIY project. Things like painting a room—even if it’s just a fresh coat of the same color—setting up a new bed—even if it’s just adding new throw pillows—or putting up some shelves are the ideal starting points for the do-it-yourself newcomer. It’s best to start simple.

Image Source: zameen.com
Suppose the job is bigger than the examples mentioned above. In that case, it’s worth considering whether you would be better off asking for professional help. A big job like a loft conversion would be too much to handle as a beginner. At the same time, anything involving electricity or plumbing could be dangerous. In these situations, speak to a professional instead, and never try to take on a job you don’t have the experience or skills to handle.
They know how to transform a space. They will be able to take your ideas and preferences and make them tangible so that you can pick up the process on the other side and complete your project. They can leave you to put up shelving, sand, varnish, and hang doors, among other easy DIY projects.
Conclusion
What is a DIY project? Well, it is just the work which people do independently, you know, without asking anyone else. It can encompass several phases and elements of a project. These DIY jobs may be small and unrelated or even complex and interlinked in some way. Here are simple DIY home improvement tips you can do by yourself: creating a gallery wall, installing a shelf, interior lighting, faucet replacement, and much more.
Before you even start either of these, there are some practical things that you need to have or consider once before even attempting your first do-it-yourself project. Check that have the right tools and gear, organize every step meticulously, always take safety into consideration and, sometimes, simply hire a professional. If you stick to these points, you will be able to achieve your very first DIY project on the first try.
Frequently Asked Questions on: What is a DIY Project?
1. How Do I Start a DIY Project?
Starting a DIY project is exciting since it allows you to enhance your creativity and make something with your hands. Here are some practical steps to get you started:
- Choose a project. Determine what DIY project you want to start.
- Research and gather information.
- Make a plan. Create a plan for your project.
- Gather the materials and tools needed for your DIY project.
- Set up your workspace.
- Before starting your DIY projects, prioritize safety.
- Start small and build confidence.
- Learn as you go. Don’t be afraid to learn as you go along.
- Enjoy the process.
- Join DIY communities, social media groups, or forums to connect with fellow DIY enthusiasts.
2. What is the Purpose of DIY?
Starting a DIY project is an excellent way to distract your attention and drown out the noise around you, such as distressing news or things beyond your control. It usually allows you to focus, plan, use your hands, and experience the empowering sense of creating something on your own.
3. How Can I Learn DIY Skills?
Learning do-it-yourself skills can be a thrilling and rewarding experience. You can learn the skills through online resources, such as joining DIY communities and forums, reading books and magazines, attending workshops and classes, and learning from experts.
4. Can DIY Make Money?
Yes, it’s possible to make a living doing DIY projects. Making money through crafts has become more popular, and home businesses are easier to start than ever. All you need to get started are supplies, access to the internet, and a little knowledge.
5. What Are the Advantages of DIY?
DIY projects usually offer several advantages that appeal to individuals of all skill levels. Here are a few of the main benefits of doing DIY projects:
- Help reduce stress and enhance your mood.
- It helps you save money.
- It allows you to be more active.
- It teaches you new practical skills.
- It allows you to spend time with your family.
6. What DIY Things Can I Do?
You can do many DIY projects depending on your skills, interests, and available resources. For instance, you can paint walls or furniture and install shelves or cabinets. Besides, you create handmade decorations such as wall art and wreaths. Moreover, you can create a vegetable garden and build raised beds, to mention a few.
Featured Image Source: organizewithsandy.com


