For the past couple of years, people have ripped out builder-grade window trim and woodwork and gone with craftsman style trim. Popularized before the 20th century, a Craftsman-style home looks inviting and warm. The good thing is even if you don’t live in a Craftsman-style home you can frame Craftsman-style window and door in to your home!
In this article, we will try to present several Craftsman-style exterior window trim designs which can be used when redesigning the outer look of your house. We will further look at the craftsman window trim installation. Keep reading for more insight!
What Is a Craftsman-Style House?
A craftsman-style house is a residential layout that is accompanied by a rage of outside and inside design work that was developed in the early 1900s. As for the craftsman homes, they are mainly similar to the bungalows in terms of the type of constructions however, the architectural motivation is set different.
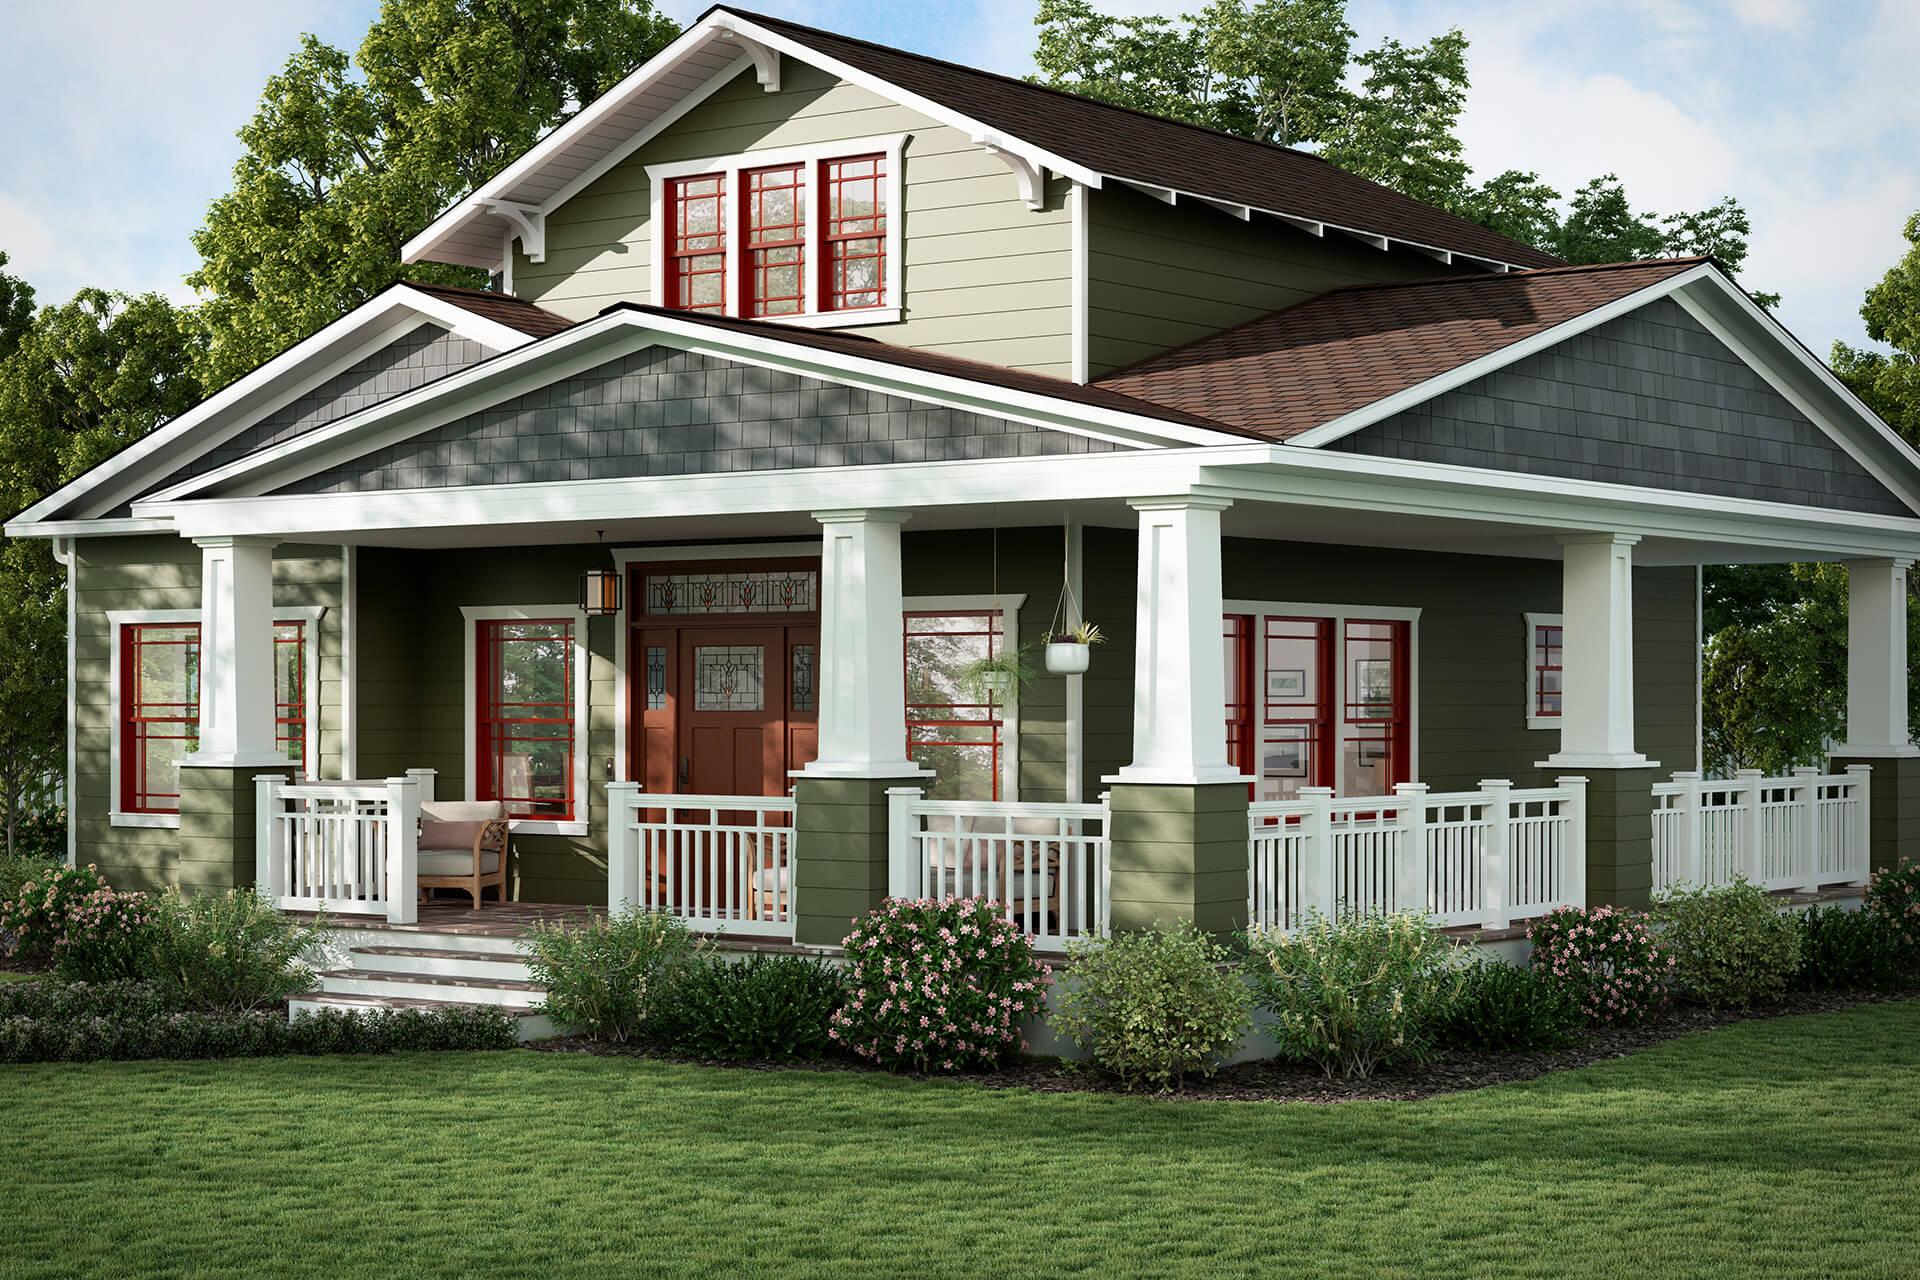
Image Source: windowworld.com
The interiors of Craftsman homes are as unique and as important as the exteriors to the builder. There is an abundance of wooden design; you will come across doors and windows that are made of wood, built-in niches for books, boxed beams on the ceiling and so on.
With that in mind let’s go ahead and look at some Craftsman-style exterior window and door Trim Ideas as well as designs that you can use to transform your home to a Craftsman-style home.
Craftsman Style Exterior Window Trim Ideas
1. Create High-Contrast with Black and White

Image Source: kellyhogan.com
You can go for this amazing craftsman-style window trim idea. This house made use a white window casing marked at the center by a dental trim for accents in the black framed windows to achieve a deep contrasting color on the framer. This style also enhances the modern appearance of the windows and the trim accents give the necessary vibrant touch that makes these homes so lively.
2. Multi-Dimensional Window Trim

Image Source: fypon.com
If you want to make your Craftsman-style home design look elegant, you can opt for a Multi-Dimensional Window Trim and door trim. The window trim offers a neatly crafted look, with minimal sides and the top and bottom flair out. It also adds a subtle class level to your front patio, making relaxing on a warm spring day more inviting.
3. Keep it Classic with White

Image Source: pvcmillwork.com
If you want simple yet classy window trim, you should go with white having window frame and white trims. All we can tell you is white on white will always be classy and neat. This idea will work on any ‘house’ color. You can choose frames of white too even if the house is white and it will add some spice to the look.
4. Modern Minimalist
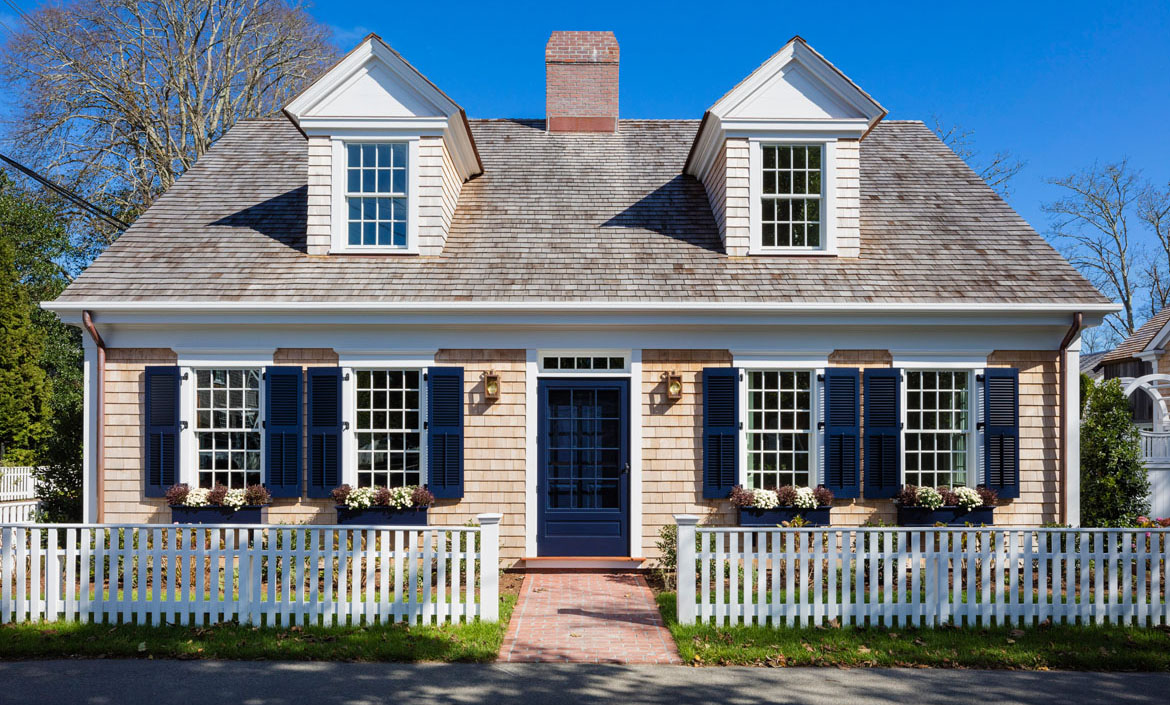
Image Source: patrickahearn.com
You can still achieve a balance of traditional style and modern sensibilities in your home by incorporating craftsman-style door and window trim. So besides having beautiful stonework and tapered columns, you can add contemporary windows and doors to your home.
Using simple black against a white window and trim combinations alongside a blend of warmer hues, you can create an inviting home exterior with great curb appeal.
5. Simple Trim and Dark-Hued Brackets

Image Source: Pintrest.com
Another great idea is to have a clean, simple look with dark-hued brackets. Then, you can go for a white trim with a dark window frame. This creates a serene contrast and makes the exterior of your home look luxurious. The best bit is that you can use the same window trim style for your front door and garage.
6. Make The Frames Look Thicker with Tone on Tone

Image Source: res.cloudinary.com
You can also make your window frame appear thicker by choosing similar colors for the window casings and frame. Unlike going for white on white, you can choose to go with another color. For instance, you can opt to go with black on black, like in the image above.
Not only is this style simple, but it gives the house a clean look and makes the windows feel more substantial.
7. Stark Angles and White Brackets

Image Source: ptglazing.co.uk
This is another unique idea that will work on any home design, and it’s precisely what you get with this window trim design. The design is not complicated, but the lines above the windows create angles that add a touch of sophistication to the whole look.
Amazing Craftsman-Style Door Trim Designs
1. Double Craftsman Doors with Glass

Image Source: homedit.com
If you want a modern touch in your home, you can go for the double artisan-style door trim. These Craftsman interior french doors emphasize the straight lines of the Craftsman style.
Depending on your house, you can choose a color that makes your home look stunning. For my DIY craftsman project, I opted to go with white.
2. Single Batten Panel Craftsman Door
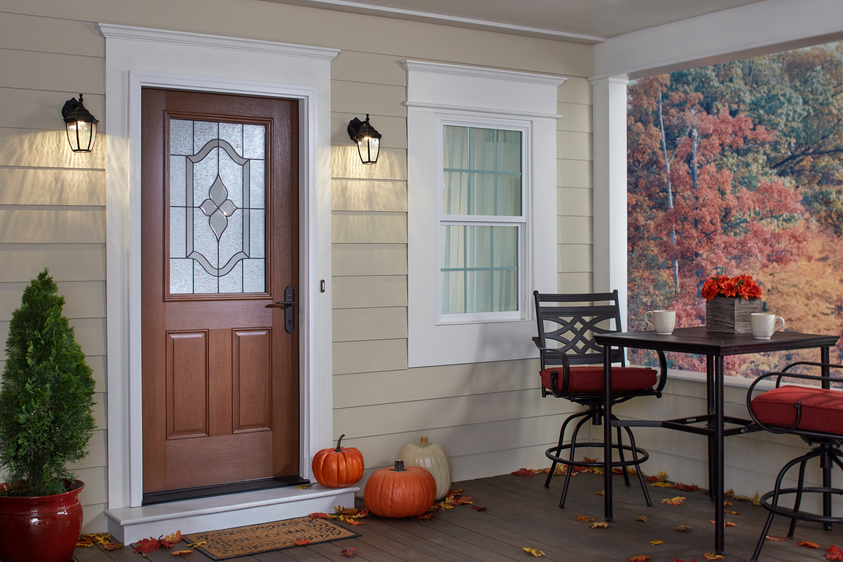
Image Source: brandfolder.io
These door craftsman door trim styles have a single recessed panel. In this design, the Craftsman door has one recessed panel. The batten door has small vertical boards which fit side by side to create the panel.
3. Horizontal Craftsman Door
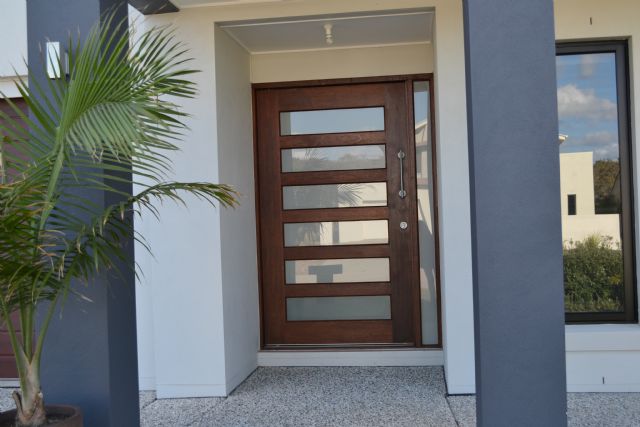
Image Source: doorcity.com
You could also opt to go for a horizontal craftsman-style door. This design can be used in a contemporary home because of its clean and simple design. The amazing bit is that it works well with historic and modern aesthetics.
4. 3 Panel Craftsman Door
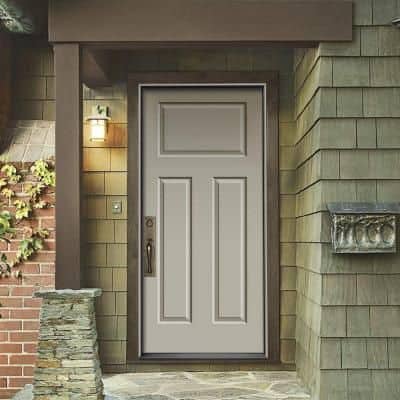
Image Source: pinterest.com
This traditional Craftsman-style door design features three recessed panels. Ideally, this design goes well with most interior doors but could also work for outdoor ones.
One larger horizontal panel is used on the door’s top part, intersecting two vertical recessed panels to create a “T” pattern. You can opt for a door that features a natural wood finish or paint the door with a cool one that blends with your house’s interior.
5. 4 Panel Craftsman Door

Image Source: Pintrest.com
Like the 3-panel craftsman style door, the 4-panel craftsman doors are ideal for interior use but can also be used for exterior use. The common varieties are these recessed panels with a central rail and stile to separate the 4 panels.
How to Install Craftsman Window Trim
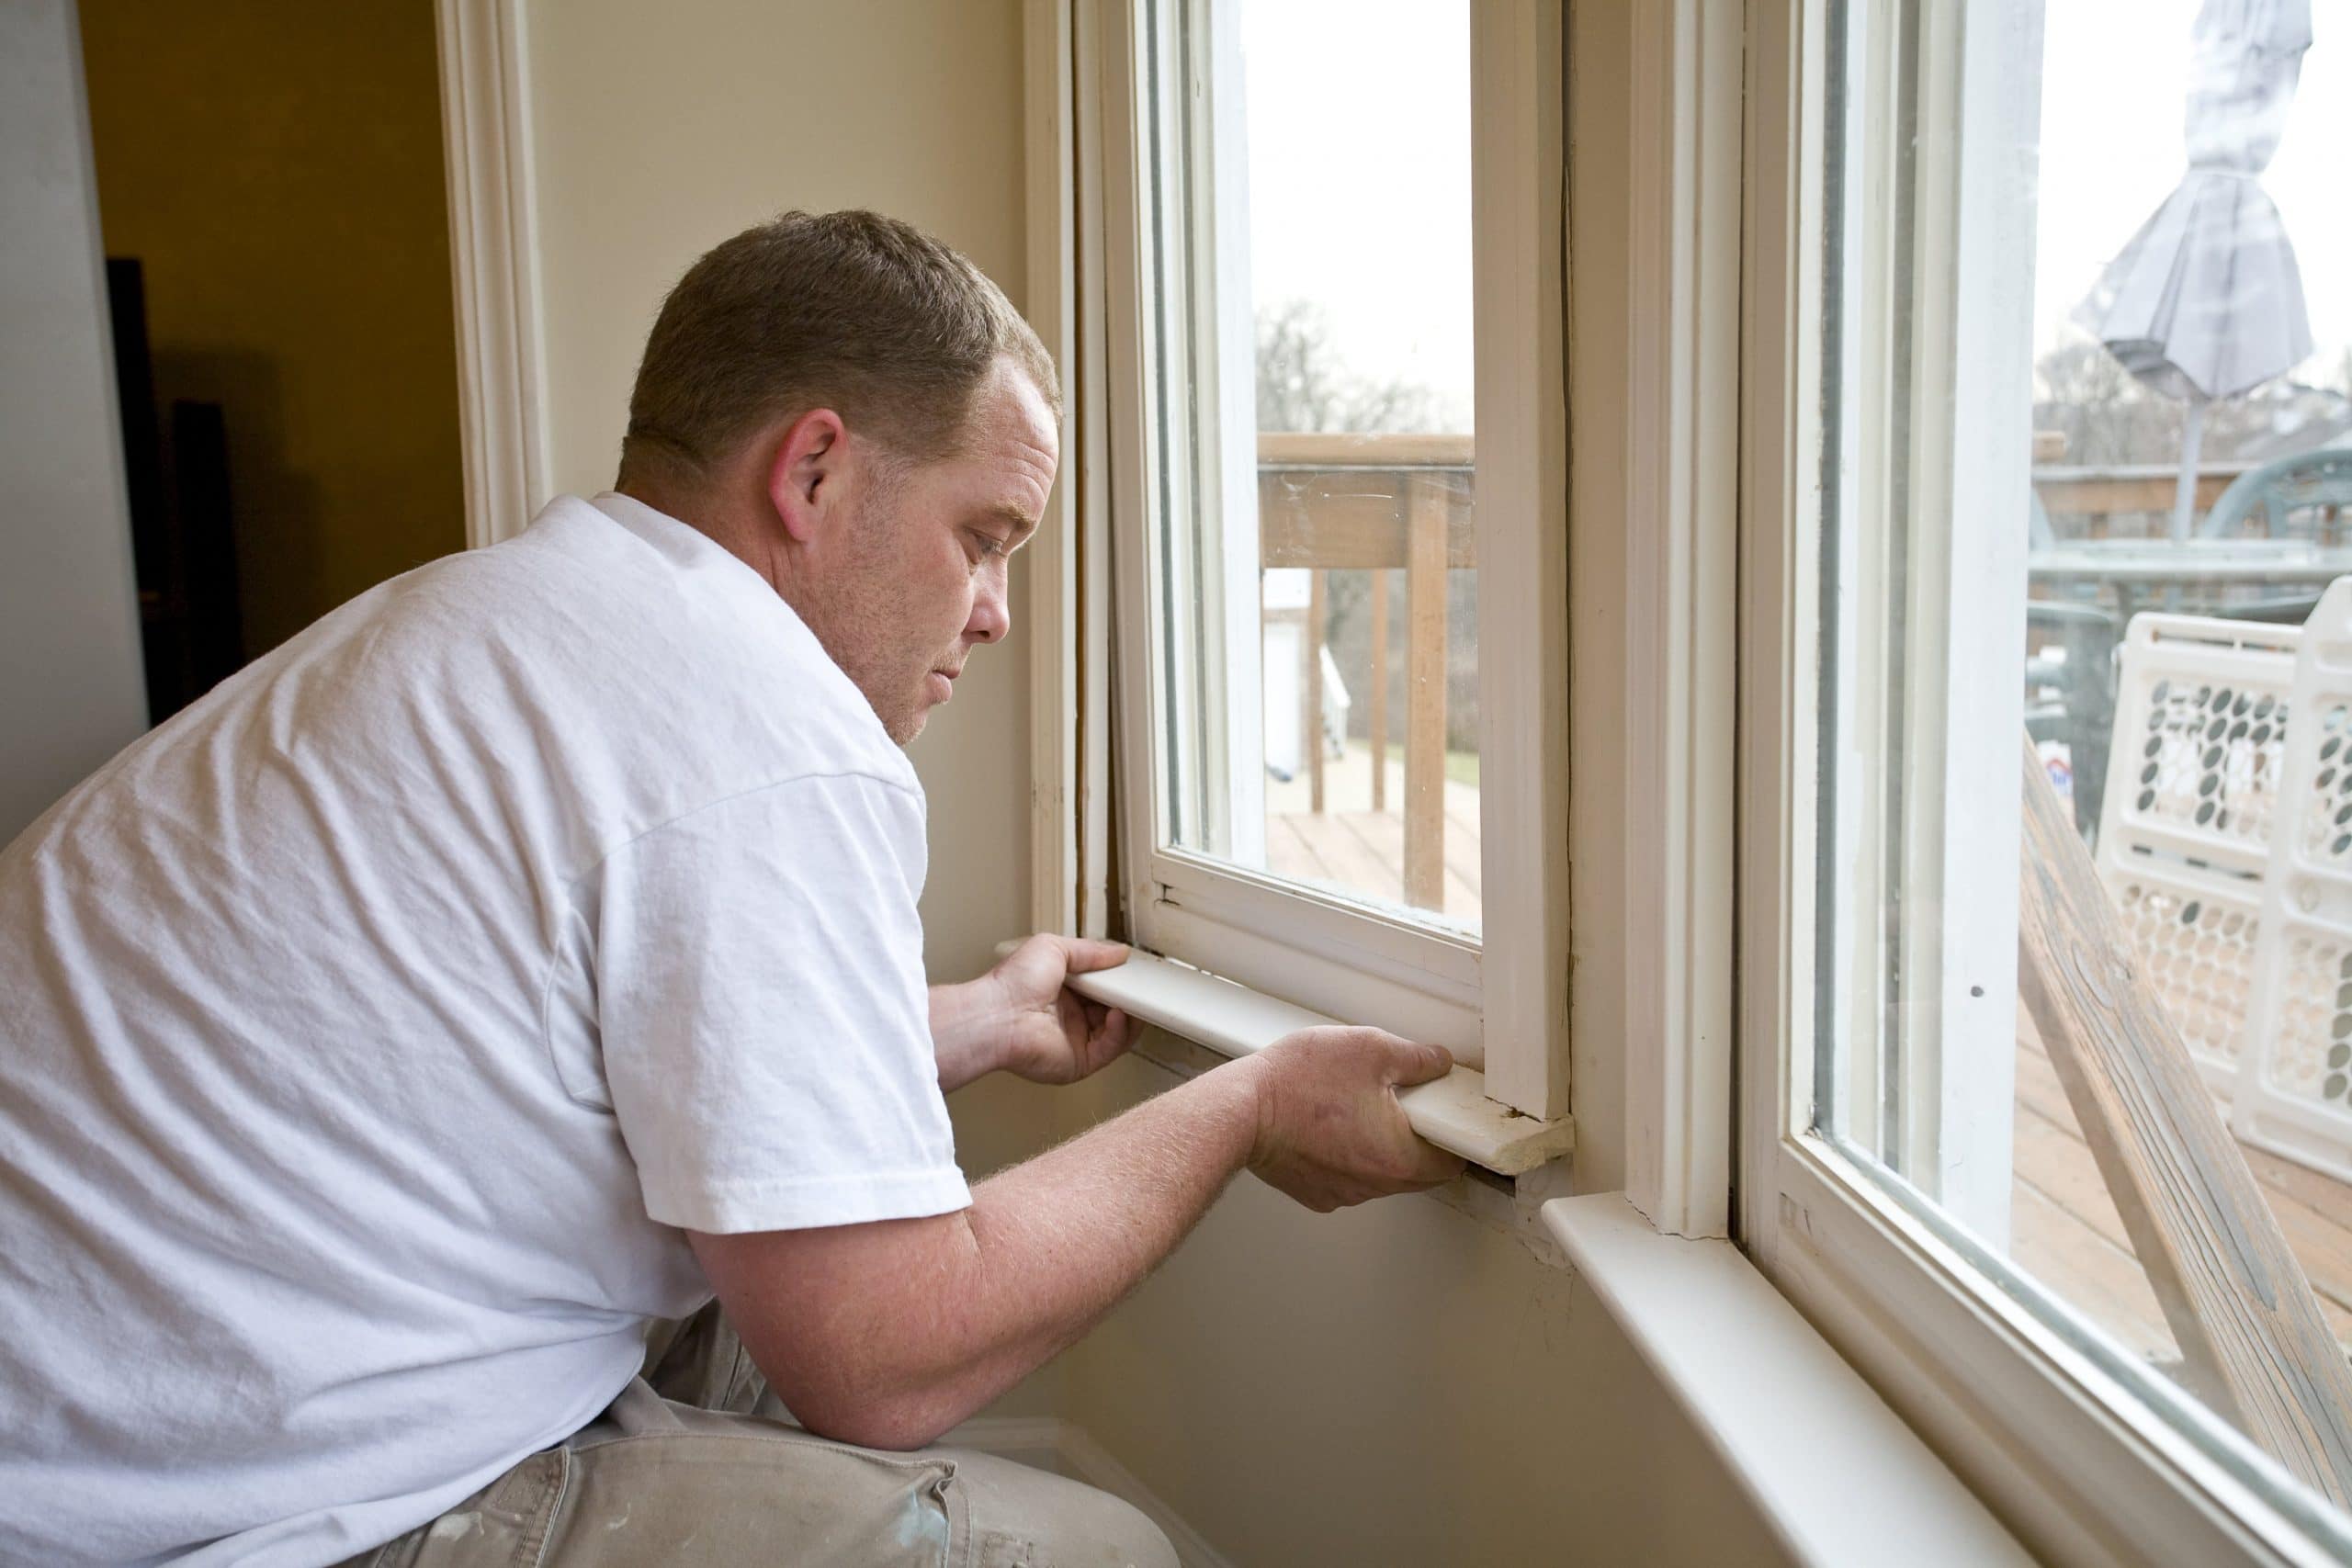
Image Source: mtcopeland.com
As we have said before, there are different styles of upgraded window trim that you can apply to your windows. I will show you how I installed a simplified Craftsman Style trim that brings a modern look to my home.
Materials and Tools Needed:
-
- Nail Gun, Trim Gun, or Brad Nailer
- Nail Gun and compressor
- Table saw
- Miter saw
- Hammer
- Pry bar or Trim puller
- Measuring tape
- Ruler or Sliding T-Square
- Drill/Driver
- Wood Glue
- Miter Saw
Step 1
You will start by removing the old window trim by using a pry bar. While doing so be very careful not to scratch the sheetrock or the windows around them by being overly aggressive or applying too much pressure. Removing the window trim should be done using a trim puller or a pry bar.

Image Source: prnewswire.com
when I was unscrewing my existing trim, I realized that the extension jam of my window or the wooden frame around our window was not broad enough because it lacked the width to reach my sheetrock.
Step 2
After that, you will measure your window since everything you do will be based on the measurement of your window. The extension jam around the window needs to be flush with the wall before the trim can be applied.
Since my extension jam was a bit small, I built a new jam with a 1 by 4-inch pine, which I measured and cut to fit.
Step 3
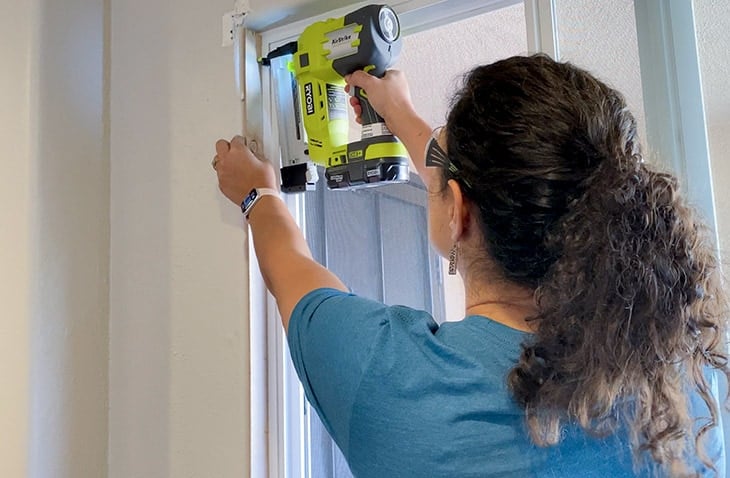
Image Source: anikasdiylife.com
To stop the material from splitting, you must pre-drill holes using a 1/8-inch drill bit. Then after you have pre-drilled holes, screw the extension jam into the window frame using a 3-inch trim head screw and your impact drill.
Step 4
Before you install the trim, you need to measure 1 by 4 inches from the edge of your window jam to be exposed for the layered look we are going for. While installing my trim pieces, I used a sliding t-square to measure this in multiple points on my extension jam, which I then used as a guide when installing the trim.
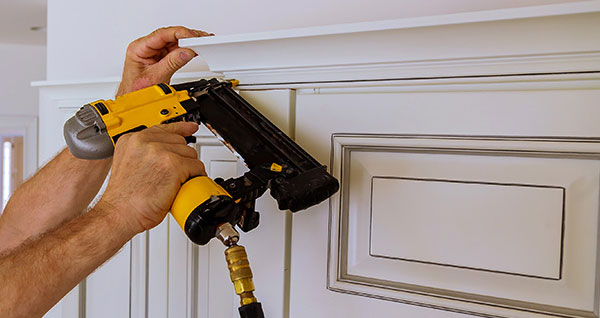
Image Source: asabuilderssupply.com
At this stage, I also cut a scrap of my 1 by 4 inches side pieces; I held it in place and marked the edge to help me pick the measure for the headpiece. Starting with the 5/4 by 6 inches headpiece of pine, I measured and cut the board to be 3/4 inches longer than the window casing on each side. Secure in place using 2-1/2 inches of trim nails and the finish nailer.
Then, for the layered look, I added a 2 by 2 inches pine on top, cut to be 3/4 inches longer than the headpiece. Afterward, I secured it in place using the best wood glue and trim nails.
Step 5
After applying wood and the trim nails, you will move on to the bottom of the windows or the sill and apron. The 1 by 4 inches apron should be the same width and length as the headpiece, which is 3/4 inches longer than the window casing.
Step 6
Then install the apron before the sill to make it easier to nail and secure everything in place. I used a leftover piece of wood at the same thickness as my sill to decide the right height of the apron before securing it.
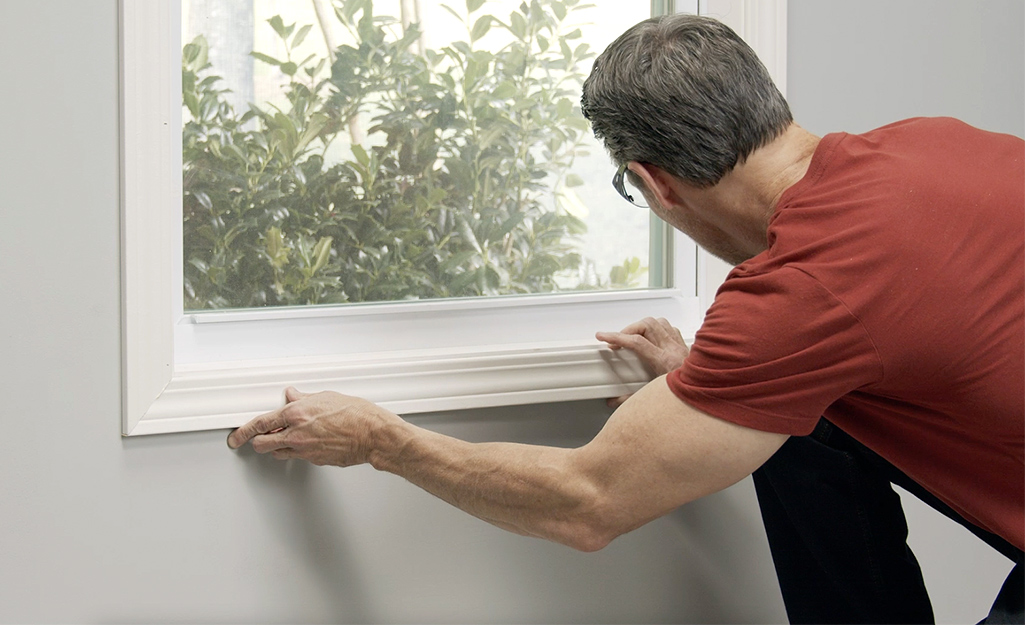
Image Source: homedepot.com
Afterward, I used a miter saw to cut a 45-degree angle on each end of the 5/4 by 2 inches sill and attach it to the apron. Finally, I attached the two with wood glue and nailed them.
Lastly, I measured the distance between my headpiece and my sill piece and cut the 1 by 4 inches of the casing to that length for the side pieces. After that, I glued the ends where they met the sill and header and attached the casing to the extension jam.
Step 7
That brings us to the final and most complex part of the window trim for the DIY craftsman. The rest is the icing on the cake. First, I decided to paste all the nail holes with the help of the wood filler and let them dry over the time. Then, with circular movements I evenly use sandpaper to sand the surface. It not only made rounding of the edges but also made equal surface area for paint to stick in on this step.
When that is done, you can paint or stain your window trim depending on your design that you want to have. I painted the window trim a white color since I wanted the overall color of my home to be that color.
How to Install a Craftsman Style Door Trims

Image Source: homedepot-static.com
Step 1
The first step is to remove your old door trim. You will first remove the door hinges; then, you can remove the door frame. Gently rip the old trim from that door frame.
Step 2
After you strip off the old door, you have to take measurements on the door frame and also saw off any sharp edges of the remains of the wood or wood glue.
Take dimensions from the inside corners across the width of the door down to the bottom of the door opening. Lastly, it would be important to measure the top of the doorway too. Thus when it is finally time to measure you should go further ahead and cut the boards to match the door measurements. Simply, you have to guarantee that all edges in your new trims are fitted correctly once all the trims are put in place.
3. Step 3
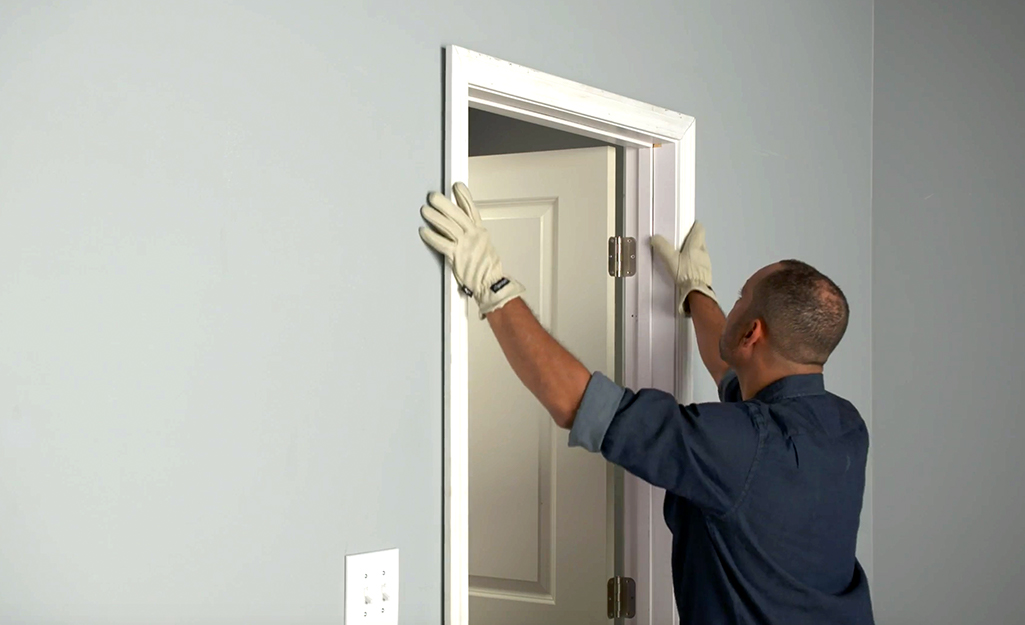
Image Source: homedepot.com
When you have cut your boards, it’s time to install them. You can install your doorway cases using a nail gun. However, you should avoid using too many nails, as you will have to fill the holes later. Also, try and position the nails as close to the edge of the siding as possible.
Once you have fastened your door trim, it’s time to fill the nail holes using wood filler, and then you can either stain or paint your door casing.
Frequently Asked Questions on Craftsman Style Trim Door and Windows
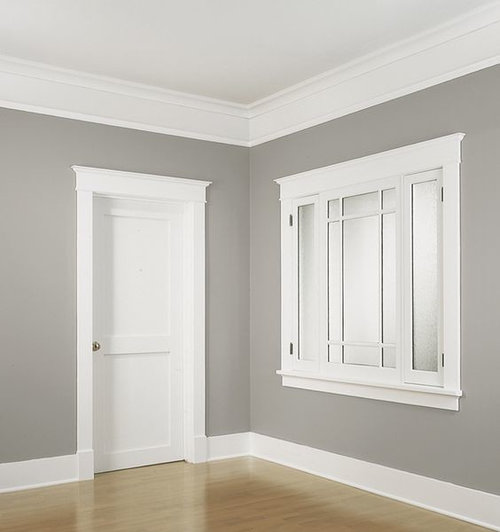
Image Source: st.hzcdn.com
1. What Material Can You Use for Exterior Window Trim?
The various material options for exterior window trims are solid wood, vinyl, fiber cement, and engineered wood. The finest woody plants are redwood grown for weathering and cedarwood.
2. What Is a Craftsman Door Trim Style?
A craftsman-style door cannot only be a wooden door. Instead, it is a horizontal strip of clear glass at the top of the door and surrounding the sides. They can have a beveled edge design, come with stained glass, or be an opaque type of light.
3. What is the Most Durable Exterior Window Trim?
Fiber cement and wood window trim can last for more than 50 years. However, they need certain maintenance and repainting at least within every five years of their usage. It is pertinent to mention here that the service durability of vinyl window trim is lesser than that of the frame, however these are virtually self-recycling trim.
Image Source: pvcmillwork.com