The slice tool is really quite handy and can be used in a number of ways. For the lack of a better term, you can consider it as the Cricut cookie cutter. It can be used to splice two similar pictures or the two varying texts in half. They obtain new cut paths of the two images where it forms three or more entirely different forms. Each of the new shapes will then appear in the Layers as the layer of its own, by the name of the shape. In this article, we will be sharing various ways that you can employ the slice tool while working in Cricut design space on your projects.
Tips and Tricks for Using The Slice Tool in Cricut
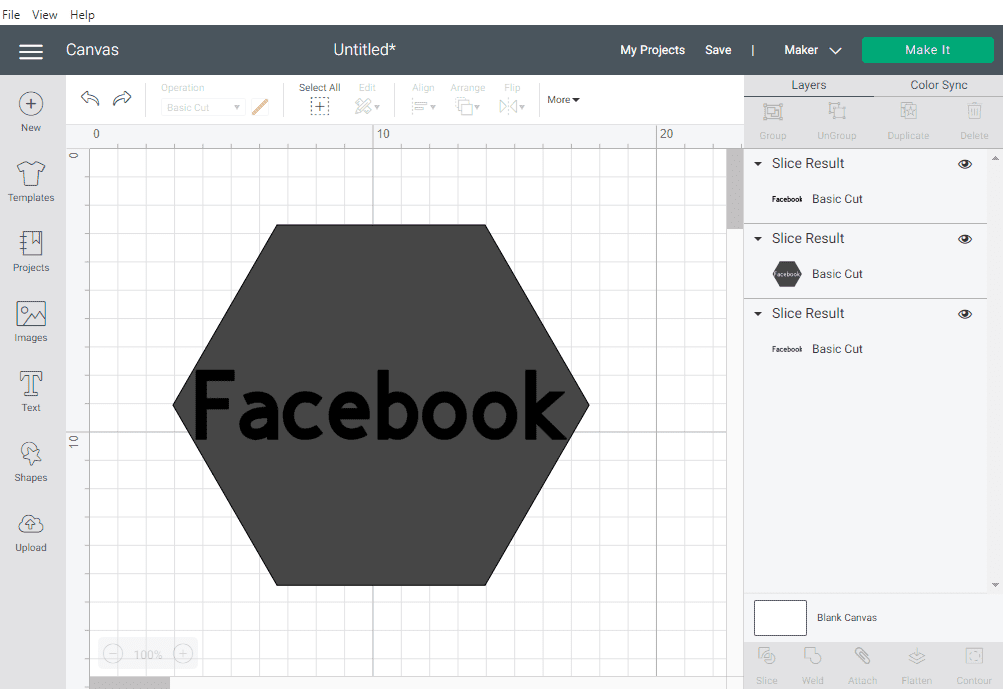
a) Cut out a shape from another shape, cut overlapping images from another and or cut text from a shape.
b) When using the slice with images, they can only work on two layers simultaneously.
c) If you are using a multilayered image, you have two options: To active the slice tool you can either hide or ungroup the other layers from the current view.
d) Slice tool can act on concealed layers. It means that all the hidden layers will be also excluded from the design screen and the layers panel.
e) If you plan on using the hidden image layers, you should first ungroup this before using the slice tool
How To Slice Two Images on Cricut Design Space
1) Add two single-layer images to your canvas
The first thing you will need to do is create two image layers in your design space. These images must be stand alone; they cannot be layered in any way at all especially with other photographs. It only allows you to slice two images together at a time. Another thing to point out is that a single-layer image should have only one color. In the layers panel on the right side of the canvas it will be easier to notice that there is only one layer for each design. In case of selecting an image with many colors, you will realize that in Cricut Design Space , the color shades will be grouped into layers. For instance, if the image is to be four-toned, then one would need four layers.
2) Overlap Your Images
The next step will be to overlap your images. This means placing the two images on top of each other. You can place them however you want, but it should be where you want to cut out.
3) Highlight Both Images
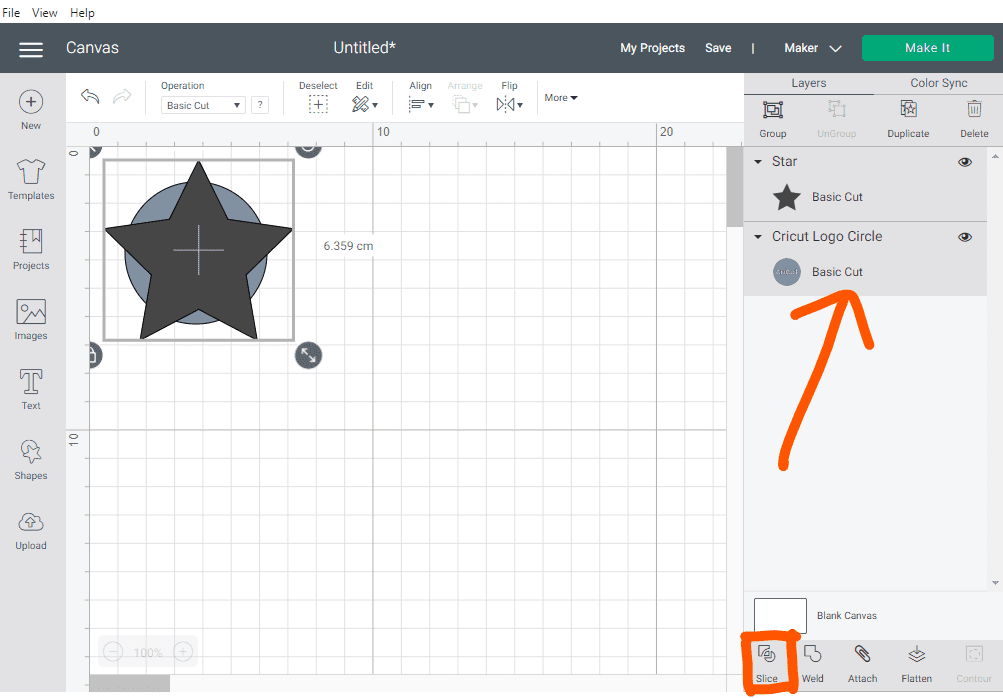
Once you have overlaid your images you may wish to highlight them both. In simple terms, when you work with our software, you just need to click and drag. You can also select one at a time while holding down Shift on Windows or cmd on the Mac. You will see a bounding box around both of the images and you will also notice that in the Layers panel the individual images are highlighted. The above layers will be selected in order to activate the slice tool.
If you are working on phone or tablet, select both images by touching the screen and moving a rectangle around the two layers. To make sure Slice option is working, click on the Actions menu located at the bottom of the screen.
4) Slice The Images
With both your images selected, click on the slice tool in the bottom right-hand corner.
5) Time To See Your Work
When you first click on the slice tool, it will seem as if nothing has happened.
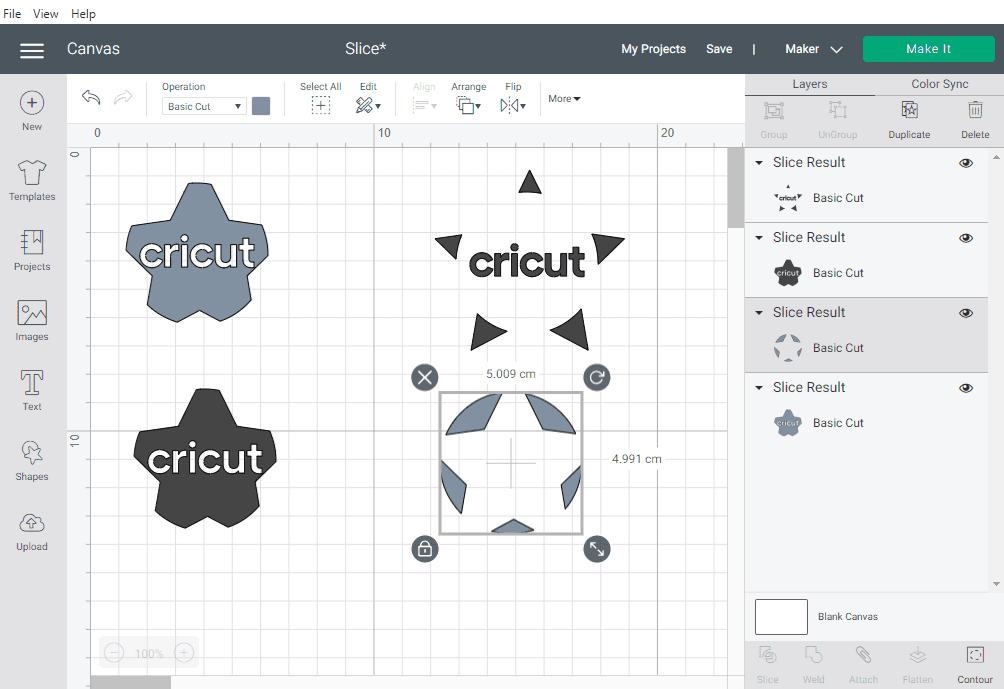
However, if you drag your image away, you’ll notice that there are now two images. (One for each layer) It's important to note that this only happens on the computer. You’ll have your original image and the one that has been cut into.
Creating Shapes Using Slice in Cricut Design Space
You can use the slice tool to create shapes that are not available in the left-hand Shapes menu in Cricut Design Space.
a) Use the Shapes toolbar to select a shape of your choice.
b) Make one big one and another small one.
c) Overlap them, highlight and use the slice tool.
Trimming Shapes Using Slice on Cricut Design Space
You can also use the slicing function to cut off certain parts of a shape you may not want.
a) Create a square from the Shapes Menu and resize to cover the part of the image you want to trim.
b) Select the square and the part you want to trim.
c) Click on the slice function
How To Slice Multiple Layer Images on Cricut Design Space
If you have multiple images and texts, you have to first weld them together. This turns them into one image, allowing you to use the slice button.
How to Slice Text /Image in Cricut
a) Add your image and text to the canvas in the Cricut design space
b) Overlap the text and image

c) Select the slice tool
How to Slice in Cricut Design Space Using “Crop/Punch” Tool
a) Start a new project in the Cricut design space

b) Add an image

c) Insert a shape and size it to cover the parts that you want to crop out

d) Select the shape first then while holding the command or control key, select your background image
e) Click the slice tool in the lower right-hand corner

f) Design Space will separate the layers allowing you to delete what you don't need.

How to Slice on Cricut Design Using “Cut Out” Function
You can use the cut-out option to remove any unnecessary parts.
a) At this point, you can insert a text and shape of your choice. Weld them to ensure that they are a single layer
b) Size to fit your shape and place it where you'd like to cut out the "word" or shape
c) Select the text first, then hold command or control, select the image.
d) Select the slice tool
Creating new designs from the basic ones on the toolbar
The slice function is a simple way to create new designs or shapes with the Cricut Design space program. Here are the steps;
1. Using the Shapes toolbar on your left, insert a shape(For this illustration, we'll use a diamond shape).
2. Select the shape and click on the duplicate button at the top right to have two similar shapes.

3. Align the circles nicely in your preferred way to make one big design.

4. Select both shapes and click slice.
5. Separate the layers, and you will new designs or shapes.

The slicing process is that simple. You can finish by deleting the shapes you'll not be using.
Why Can’t I Slice in Cricut Design Space?
It can only slice two images at a time. In case you face some issues, be sure that your images are welded or in single layer.
If you are still experiencing issues making a slice in Cricut there could be a speck on debris on the mat. A single site is sufficient to produce the disease. Search for it and remove it If you try and locate it and fail to remove it then that will be the end of it for you. It could be under your image. If all the controls are not visible you simply have to click over the area. If the debris is there then a box will appear.
At other times you will realize that when you select your overlapped images, the slice tool may not be displayed. This most likely indicates that you have three or more layers chosen at that particular time. Do note here that the slice in Cricut design space can only apply action on two layers at one time.
Conclusion
In summary, here are the things you need to know about the Slice tool;
- Using slice in Cricut Design Space can help you cut out a shape you want from an image or another shape, cut out overlapping shapes from each other, or cut out a text from an image or shape.
- It is only possible to slice up to two layers of the specimen at any given time.
- To add and delete slice data for multi-layered images you can either hide or ungroup them.
- When you use the Slice tool with the other layers that are being hidden then the hidden layers will not appear both on the design screen as the Layers panel. They should not be used later together, so it is better to ungroup before using the Slice tool.


