
A bathroom remodel can make a statement, and there are many ways to do so. Depending on your budget and bathroom remodeling objectives, your project will likely fall into one of three categories: a one-day bathroom remodel, a bathroom update, or a fully custom bathroom restoration.
If you’ve been putting off remodeling your bathroom because you can’t bear to be without this vital place for weeks, a one-day remodel could be the solution. Without forcing you to give up a lot of time or effort, these changes can give your house a new look.
If the one-day bath remodel has piqued your interest, continue reading. You can discover everything there is to know about one-day bathroom remodels from our comprehensive analysis.
What Is a One-Day Bathroom Remodel?
Many people put off bathroom remodeling because it is inconvenient. Remodeling a bathroom isn’t the most practical home improvement job because 60% of Americans only have two bathrooms in their home.
Many of your daily routines rely on your bathroom, even though you can sleep on the couch while rebuilding your bedroom and dine elsewhere while remodeling your kitchen. One-day bathroom remodels are fortunately offered by many companies.
Since your current fixtures and fittings are reused and given a “new skin,” remodeling a bathroom in a single day is easy. This means covering your old tub and shower with a fresh layer of durable acrylic without having to replace the supporting structural components.
The nicest part is that you can choose how much or how little you want to get done in a day. There is no cap on what you can renovate, and there is no minimum amount you need to spend to qualify for the one-day benefit.
One-Day Bathroom Remodel Options
You have a few options if you want to remodel your current bathroom in a day.
1. Cover Up
Your bathroom will not be altered during this remodel. The plumbing remains fixed, and the bathtub remains in place. Thus, hardly anything is altered.
A bathroom remodeling company will install a new bathtub cover instead. Unlike a covering for old furniture, this insert is placed over your existing tub.
They put your old tub in place and put it below. Nonetheless, it might look more appealing than a mold-covered, ancient tub.
The old bathtub is still concealed by the new fixture, though. This is more than just a temporary fix; it’s really unnerving to learn that your initial problems are still present in a subtle way.
2. Replacement
The second possibility involves having a professional remodeler measure your bathroom, construct a new tub or shower to fit the area, and then install it in its place. Your old bathtub or shower is removed on the day the new tub is installed.
The plumbing will all need to line up or only require minor changes to complete in a single day. In addition, it’s not a straightforward tile-by-tile installation because the shower has to be constructed elsewhere.
However, it does allow you to drastically alter your bathroom’s appearance and functionality with little to no downtime.
One-Day Bathroom Remodel Tips and Considerations
A bathroom remodel might yield a return on investment of about 200 percent, depending on where you reside. Additionally, even if you don’t have any immediate plans to sell, a new bathroom may significantly enhance the appeal of your home.
1. Have a Clear Vision of Your Goals Before You Start
Knowing what you like and don’t like about your space is important, whether or not a design team is in charge of the project. This is because it will assist produce a detailed floor plan that includes all the necessary modifications.
After that, aesthetics can be taken into account, including the color palette and the fixtures you choose to utilize.
2. Conduct Research
Designers often find that their most well-informed clients end up being their best. Grab as many pictures as possible from Pinterest and Instagram of rooms you like to use as examples.
Your ability to make good choices in the future will improve as your eye grows more attuned to what you value. As an added bonus, you’ll have a reliable resource to use as a reference while making your final decision.
3. Understand Your Budget
A flexible budget enables you to make last-minute design choices that increase costs and dramatically improve the space.
The fittings and finishes are ultimately what you will see every day, and things crop up during building, so always leave yourself some more money for them.
4. Be Selective While Hiring
It’s important to start with a solid team that you can rely on, who knows how to handle your money and your budget so they can shine. This will enable you to create breathtaking results.
5. Pay Attention to Details
The importance of dry runs with white marble cannot be overstated.
Remember that the person laying the small bathroom shower tiles may have a different vision of what constitutes a perfectly aligned marble vein along the floor, so it’s important to practice this first.
Additionally, before sorting the material, open each tile box; the colors will differ, and sorting will allow you more choice over what goes where and what pieces you can discard.
The majority of people recommend obtaining at least 15% more material than is needed because of this plus the frequent occurrence of cracking and breaking during shipping and handling.
6. Refinish Your Wooden Floor with Paint
Wooden bathroom floors can be easily covered with tile, sheet vinyl, or luxury vinyl plank to make them more water-resistant. Alternatively, you might keep your wooden floor and simply paint it with a protective lacquer to save time, energy, and money.
However, solid hardwood shouldn’t be your go-to for a bathroom because of the humidity and moisture. But if you have wooden flooring already, this is a cheap way to preserve the floors for as long as possible.
7. Consider Refinishing Your Tub Rather Than Replacing It
Replacing your bathtub completely should be your last option if you’re seeking to cut costs. Refinishing or refining the area would be a better choice.
Refinishing your shower or the best bathtub tray is an option if the damage is minor and affects the aesthetics, such as when the surface has yellowed, or there are little fractures and nicks.
On the other hand, shower and bathtub liners are never a permanent solution and can cost more than a new fixture. A shower liner may need professional installation and will last you a few years. Instead, bathtub refinishing is more affordable and frequently looks nicer.
8. Install New Hardware to Refresh the Cabinets
The materials and labor involved in replacing bathroom cabinets can be very expensive. To breathe new life into your old cabinets, it is considerably less expensive and time-consuming to remove the old hardware and replace it with eye-catching new hardware.
Before you go out and buy the new hardware, check to see if the screw alignment is compatible with the holes in your current cabinets. Therefore, no additional holes will have to be drilled.
9. Never Attempt to Do Major Plumbing
Keep the restrooms and showers where they are to save money and time. The plumbing doesn’t need to be moved if its current location meets your demands. Any remodeling project’s cost increases quickly when the water supply or drainage is moved.
If you dread having to hire a plumber for your makeover, take a moment to assess whether or not the job is something you could handle on your own. Plastic PEX plumbing pipes and push-in fittings have enabled even the most inexperienced do-it-yourself plumber to complete simple plumbing jobs.
Consider this approach carefully if your idea of plumbing work is stuck in the days of soldering copper pipes over an open flame or dealing with galvanized pipes. A little research could reveal that PEX with push-in fittings is your ideal solution.
10. Replace the Sink Faucet
Designers and do-it-yourselfers alike are aware that a new faucet and new cabinet hardware can make a sink look brand new without having to replace the vanity or top.
Sink faucets are simple, quick, and straightforward to install on your own, which is helpful. There is no need for you to hire a plumber. This not only speeds up the timeline but also reduces labor costs. It’s that simple; simply pick up the sink faucet in the morning and have it running before noon.
One-Day Bathroom Remodel Ideas
One-day bathroom remodels are fantastic, but having to make all of these choices at once may be somewhat stressful. If you’re in need of remodeling assistance, these amazing bathroom makeover ideas will inspire you.
1. Bathroom Lacking Personality Remodeled Classic and Beautiful Bathroom
Before:
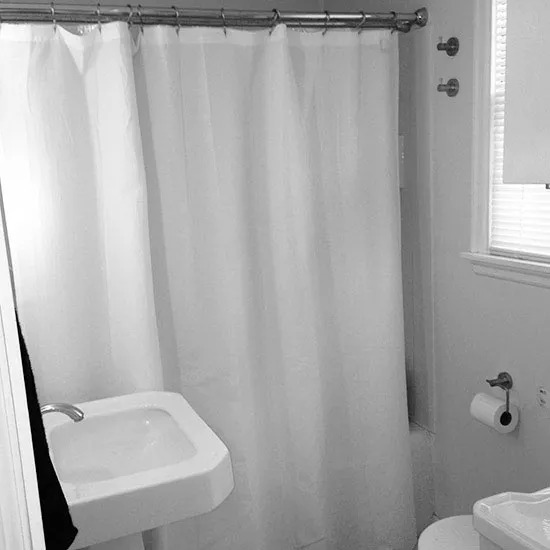
Image Source: bhg.com
The lack of color, design, and style has always been a problem in this bathroom. The changes were subtle, but they had a major impact. This previously dull bathroom was given a total makeover thanks to adding some color accents.
After:
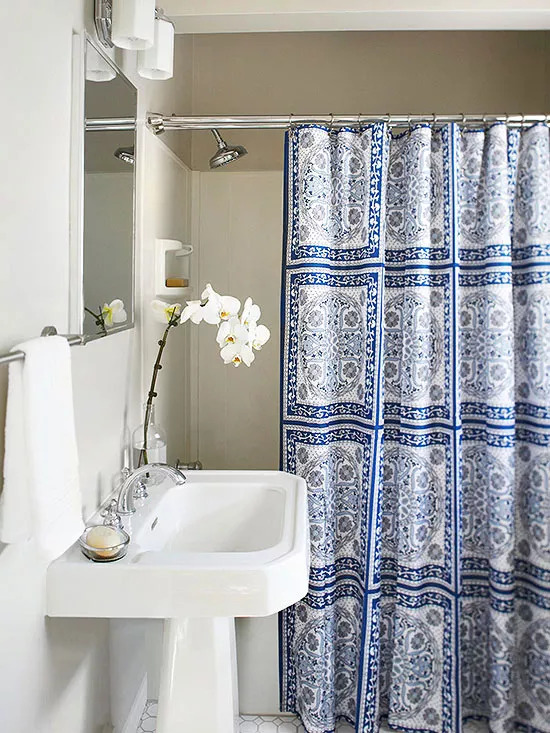
Image Source: bhg.com
After a few minor renovations, the once-boring room now serves as a relaxing retreat. The room’s new flooring and furnishings were conceptualized around the angular form of the preexisting pedestal sink.
The shower curtain, with its bright blue print resembling the form, is another example. The shower curtain rod adds a modern touch to the bathroom’s decor but can be readily removed should you want to update the space’s aesthetic.
2. Old and Outdated Remodeled on a Budget
Before:
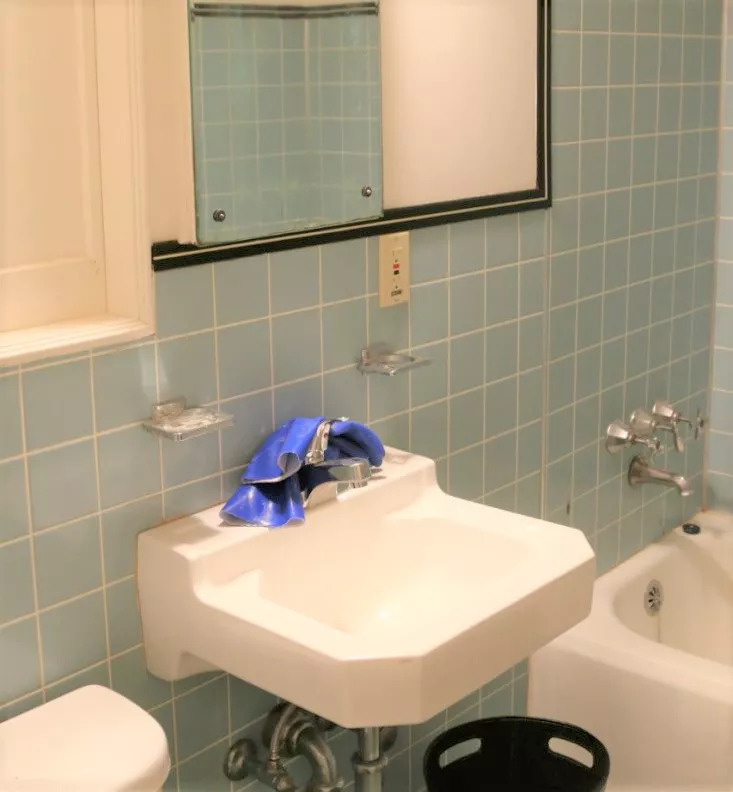
Image Source: remodelista.com
Here we see the “before” version of a bathroom in a San Francisco two-story row house from the 1930s, with tiles in an unnatural green color. A budget-friendly renovation of this bathroom was desperately required.
After:
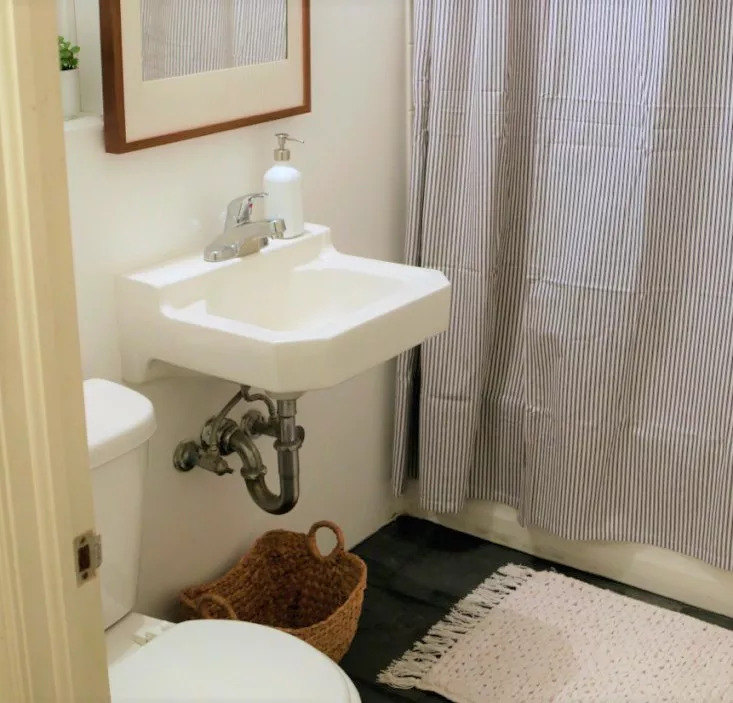
Image Source: remodelista.com
The price of this renovation was significantly lower than $5,000. Investing in fashionable yet reasonably priced construction materials is one approach to reducing bathroom renovation costs. For example, the white 3″ x 6″ Daltile Rittenhouse Square tile shown here is from Home Depot.
3. Awkward Use of Space Converted to a Glamorous Retreat
Before:
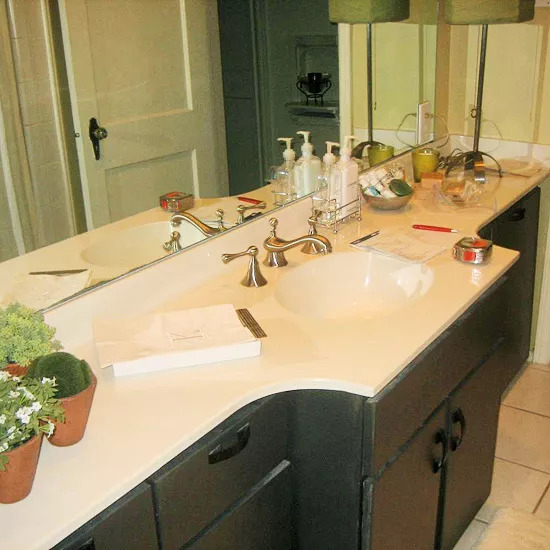
Image Source: bhg.com
The big, black vanity in this bathroom has an aesthetic issue. The arrangement left little space for the vanity.
While upgrading to new cabinets might have improved the room’s aesthetic, it wouldn’t have solved the problem of the bathroom feeling too small. The cost of altering the floor layout to accommodate a larger unit would have been very high.
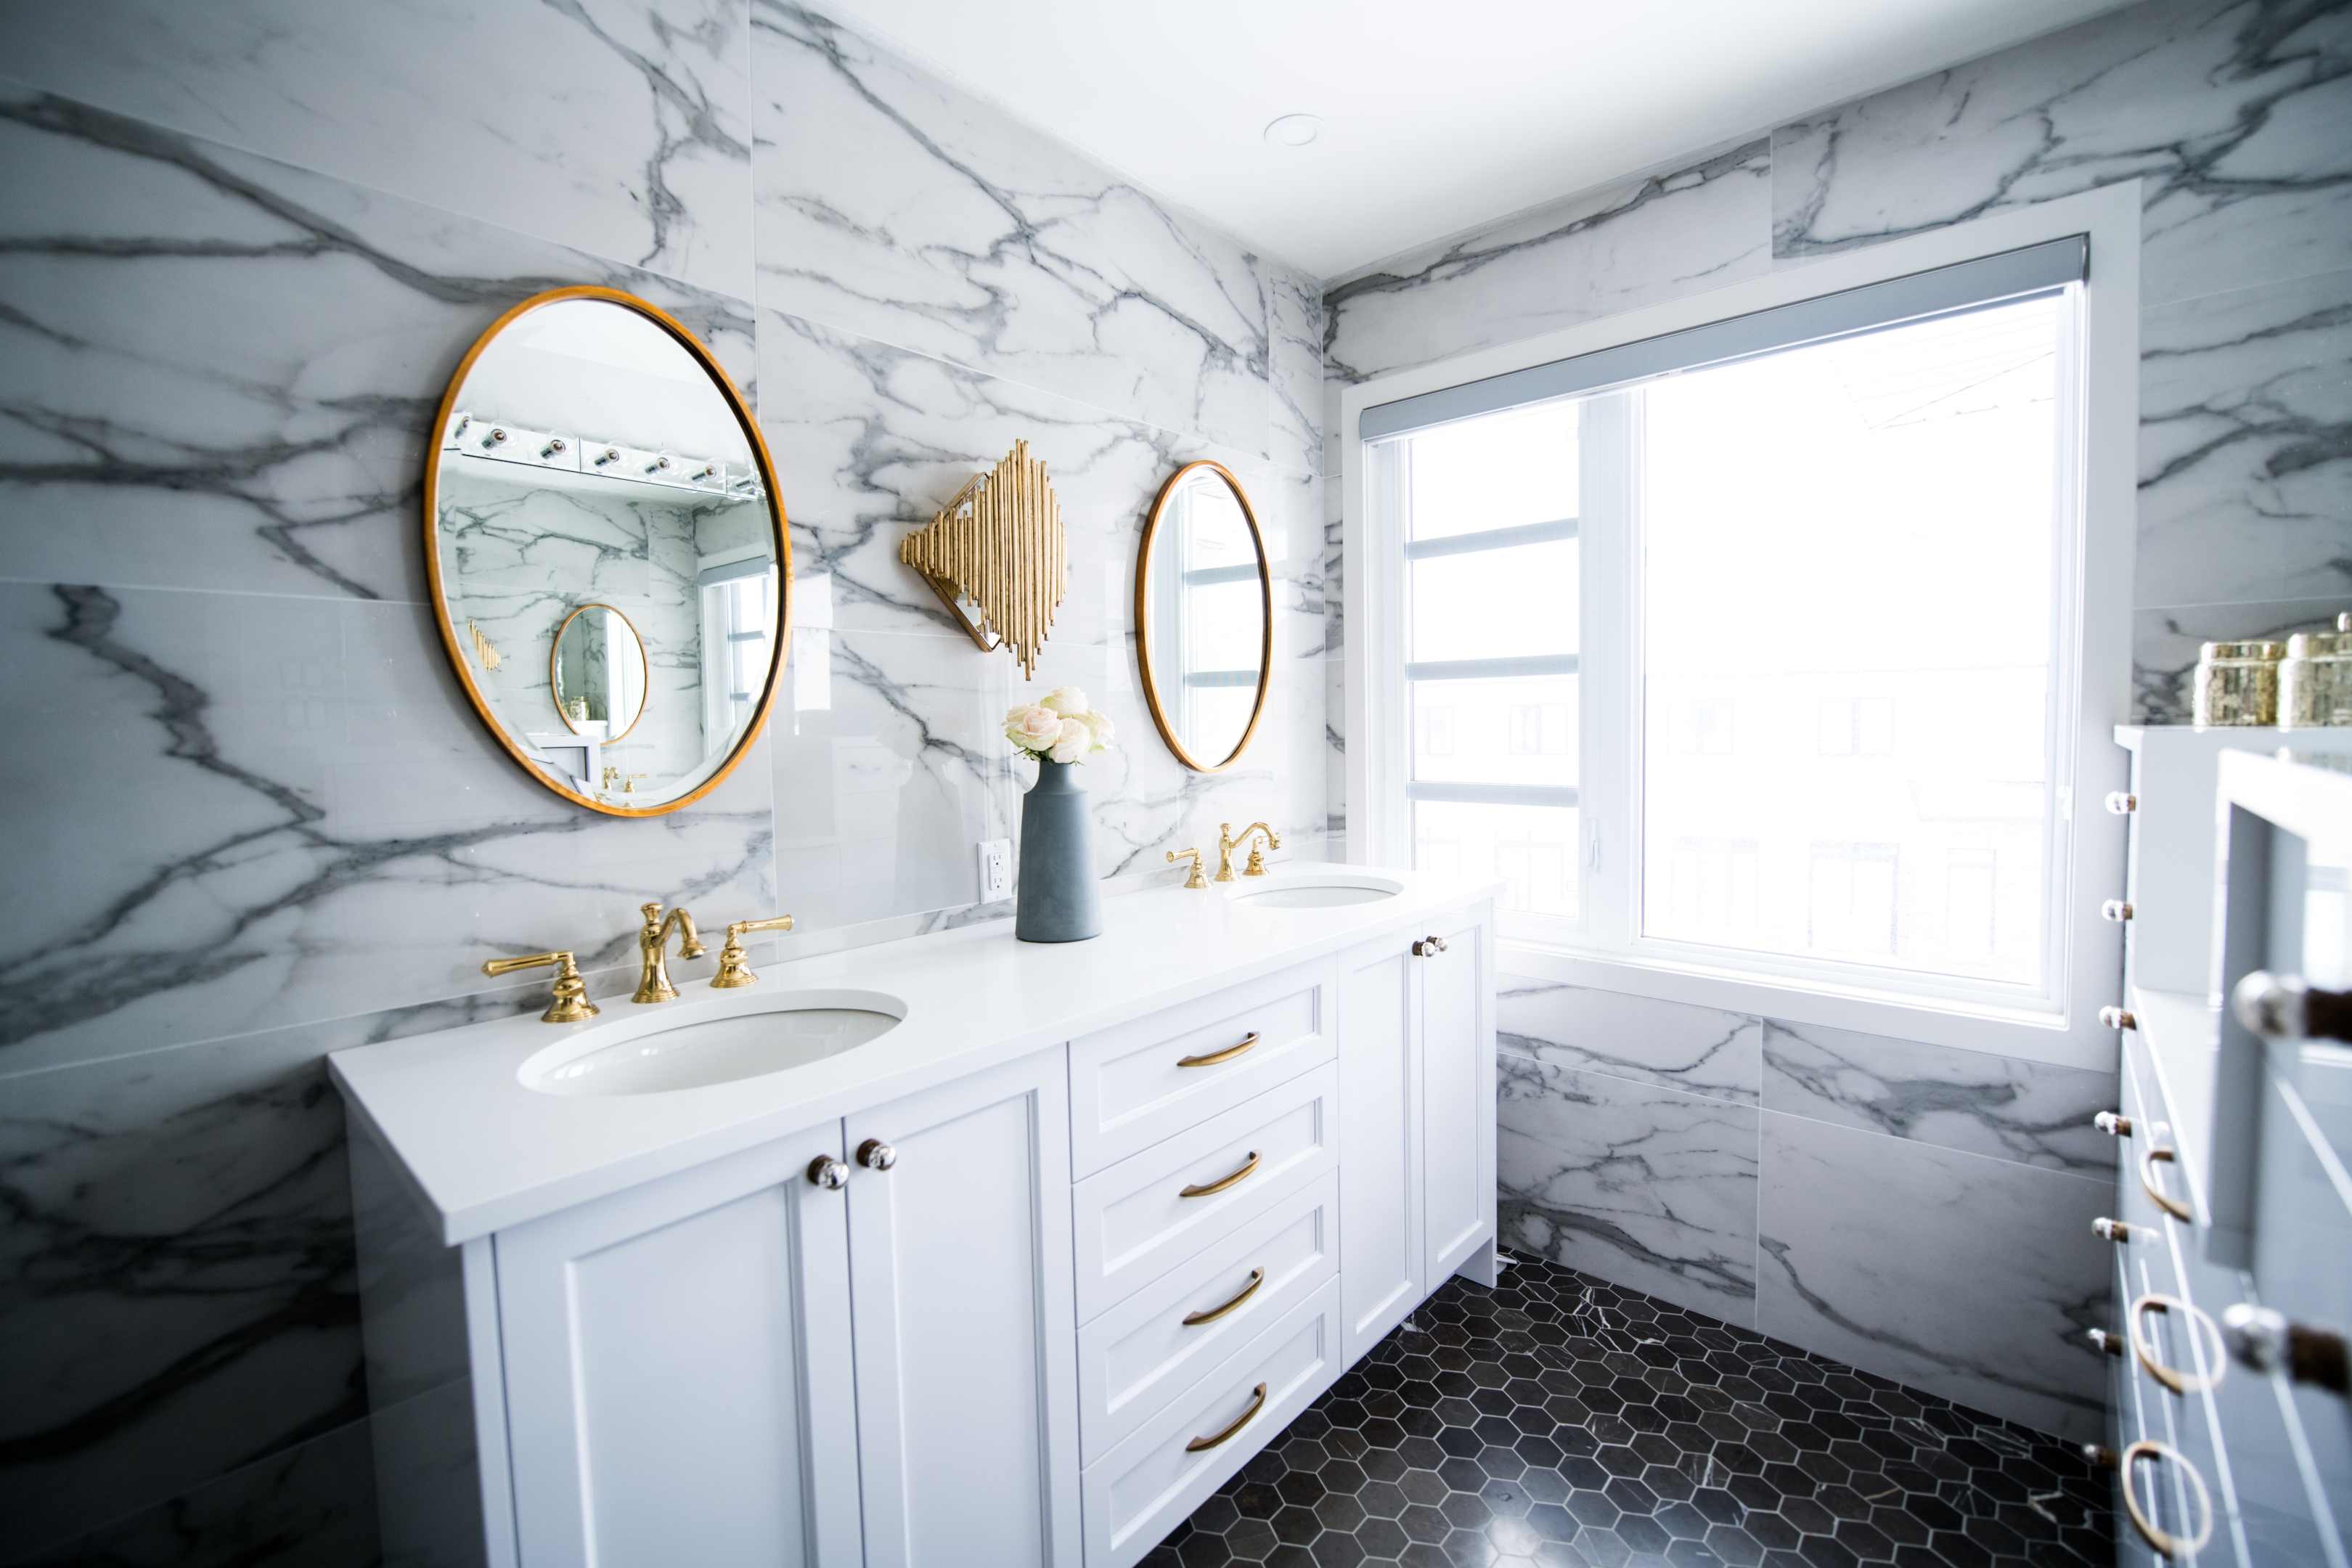
After:
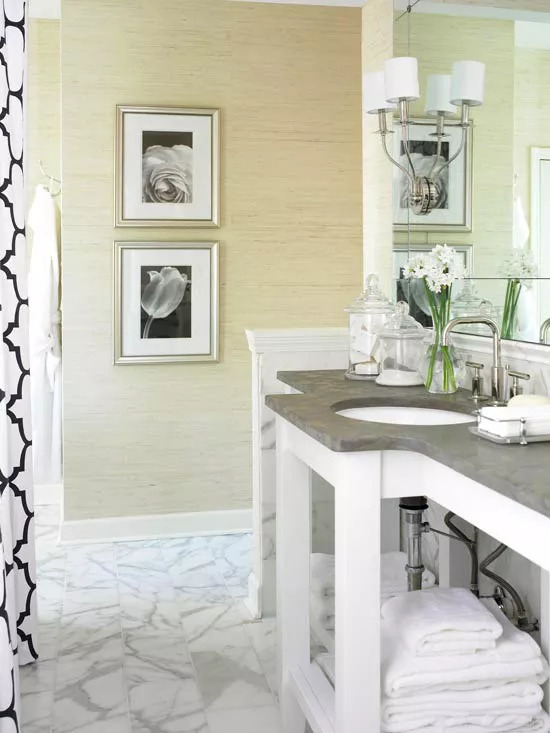
Image Source: bhg.com
The transformation began with the installation of chic grasscloth wallpaper, which immediately increased the brightness of the space. The rest of the space did likewise. Installing an available unit as a workaround for the vanity problem maintains the room’s airy vibe.
The luxurious appearance of the newly renovated bathroom is thanks to the great investment in Calacatta gold marble. In addition, the floor and half of the wall behind the vanity are covered in black-vein stone for a uniform appearance.
4. Beleaguered Bath Remodel to a Clean and Serene Bath
Before:
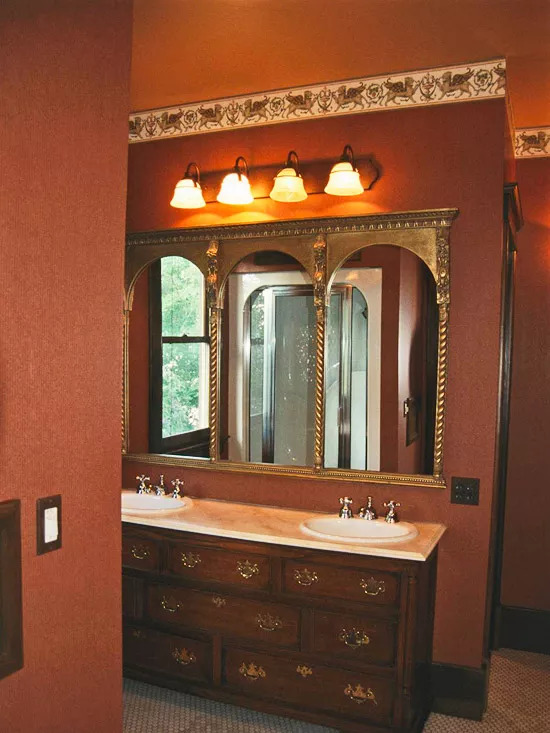
Image Source: bhg.com
Inadequate lighting and dark, antiquated paint jobs on the walls, ceiling, vanity, and woodwork were among the problems with this bathroom expansion that made the space feel cramped. A door did not sufficiently separate the bedroom/bathroom combination. Thus, the room did not have a relaxing spa vibe.
After:
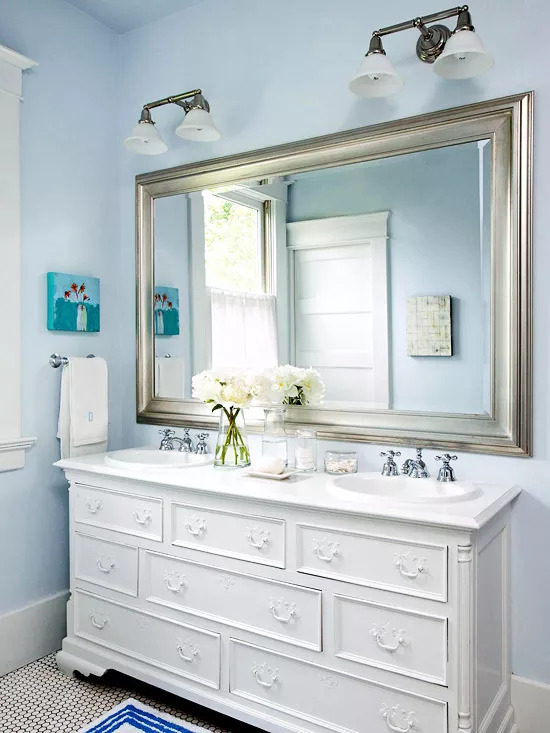
Image Source: bhg.com
The Chippendale-style vanity was kept, and a new coat of white paint gave it a new look and life, saving the homeowners money. Moreover, the wood countertop was shielded from moisture by multiple layers of high-gloss enamel paint.
The homeowners chose a soothing blue color for the walls and ceiling, while the original white trim work helped to reflect light across the space.
An upgraded vintage look is achieved by adding a silver-framed mirror and modern wall sconces. The new toilet, installed in the space formerly occupied by the shower, is hidden behind a mirror-facing pocket door.
5. Cramped and Creaky Bathroom Renovation into a Relaxing Spa Oasis
Before:
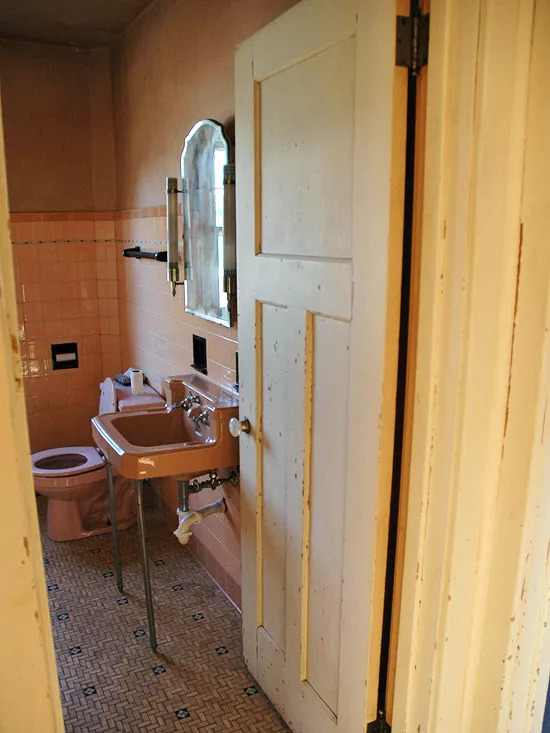
Image Source: bhg.com
This bathroom’s salmon-colored ceramic tiling and matching sink and toilet weren’t the only issues. The area surrounding the wall-mounted sink was too small for toiletries or cleaning materials.
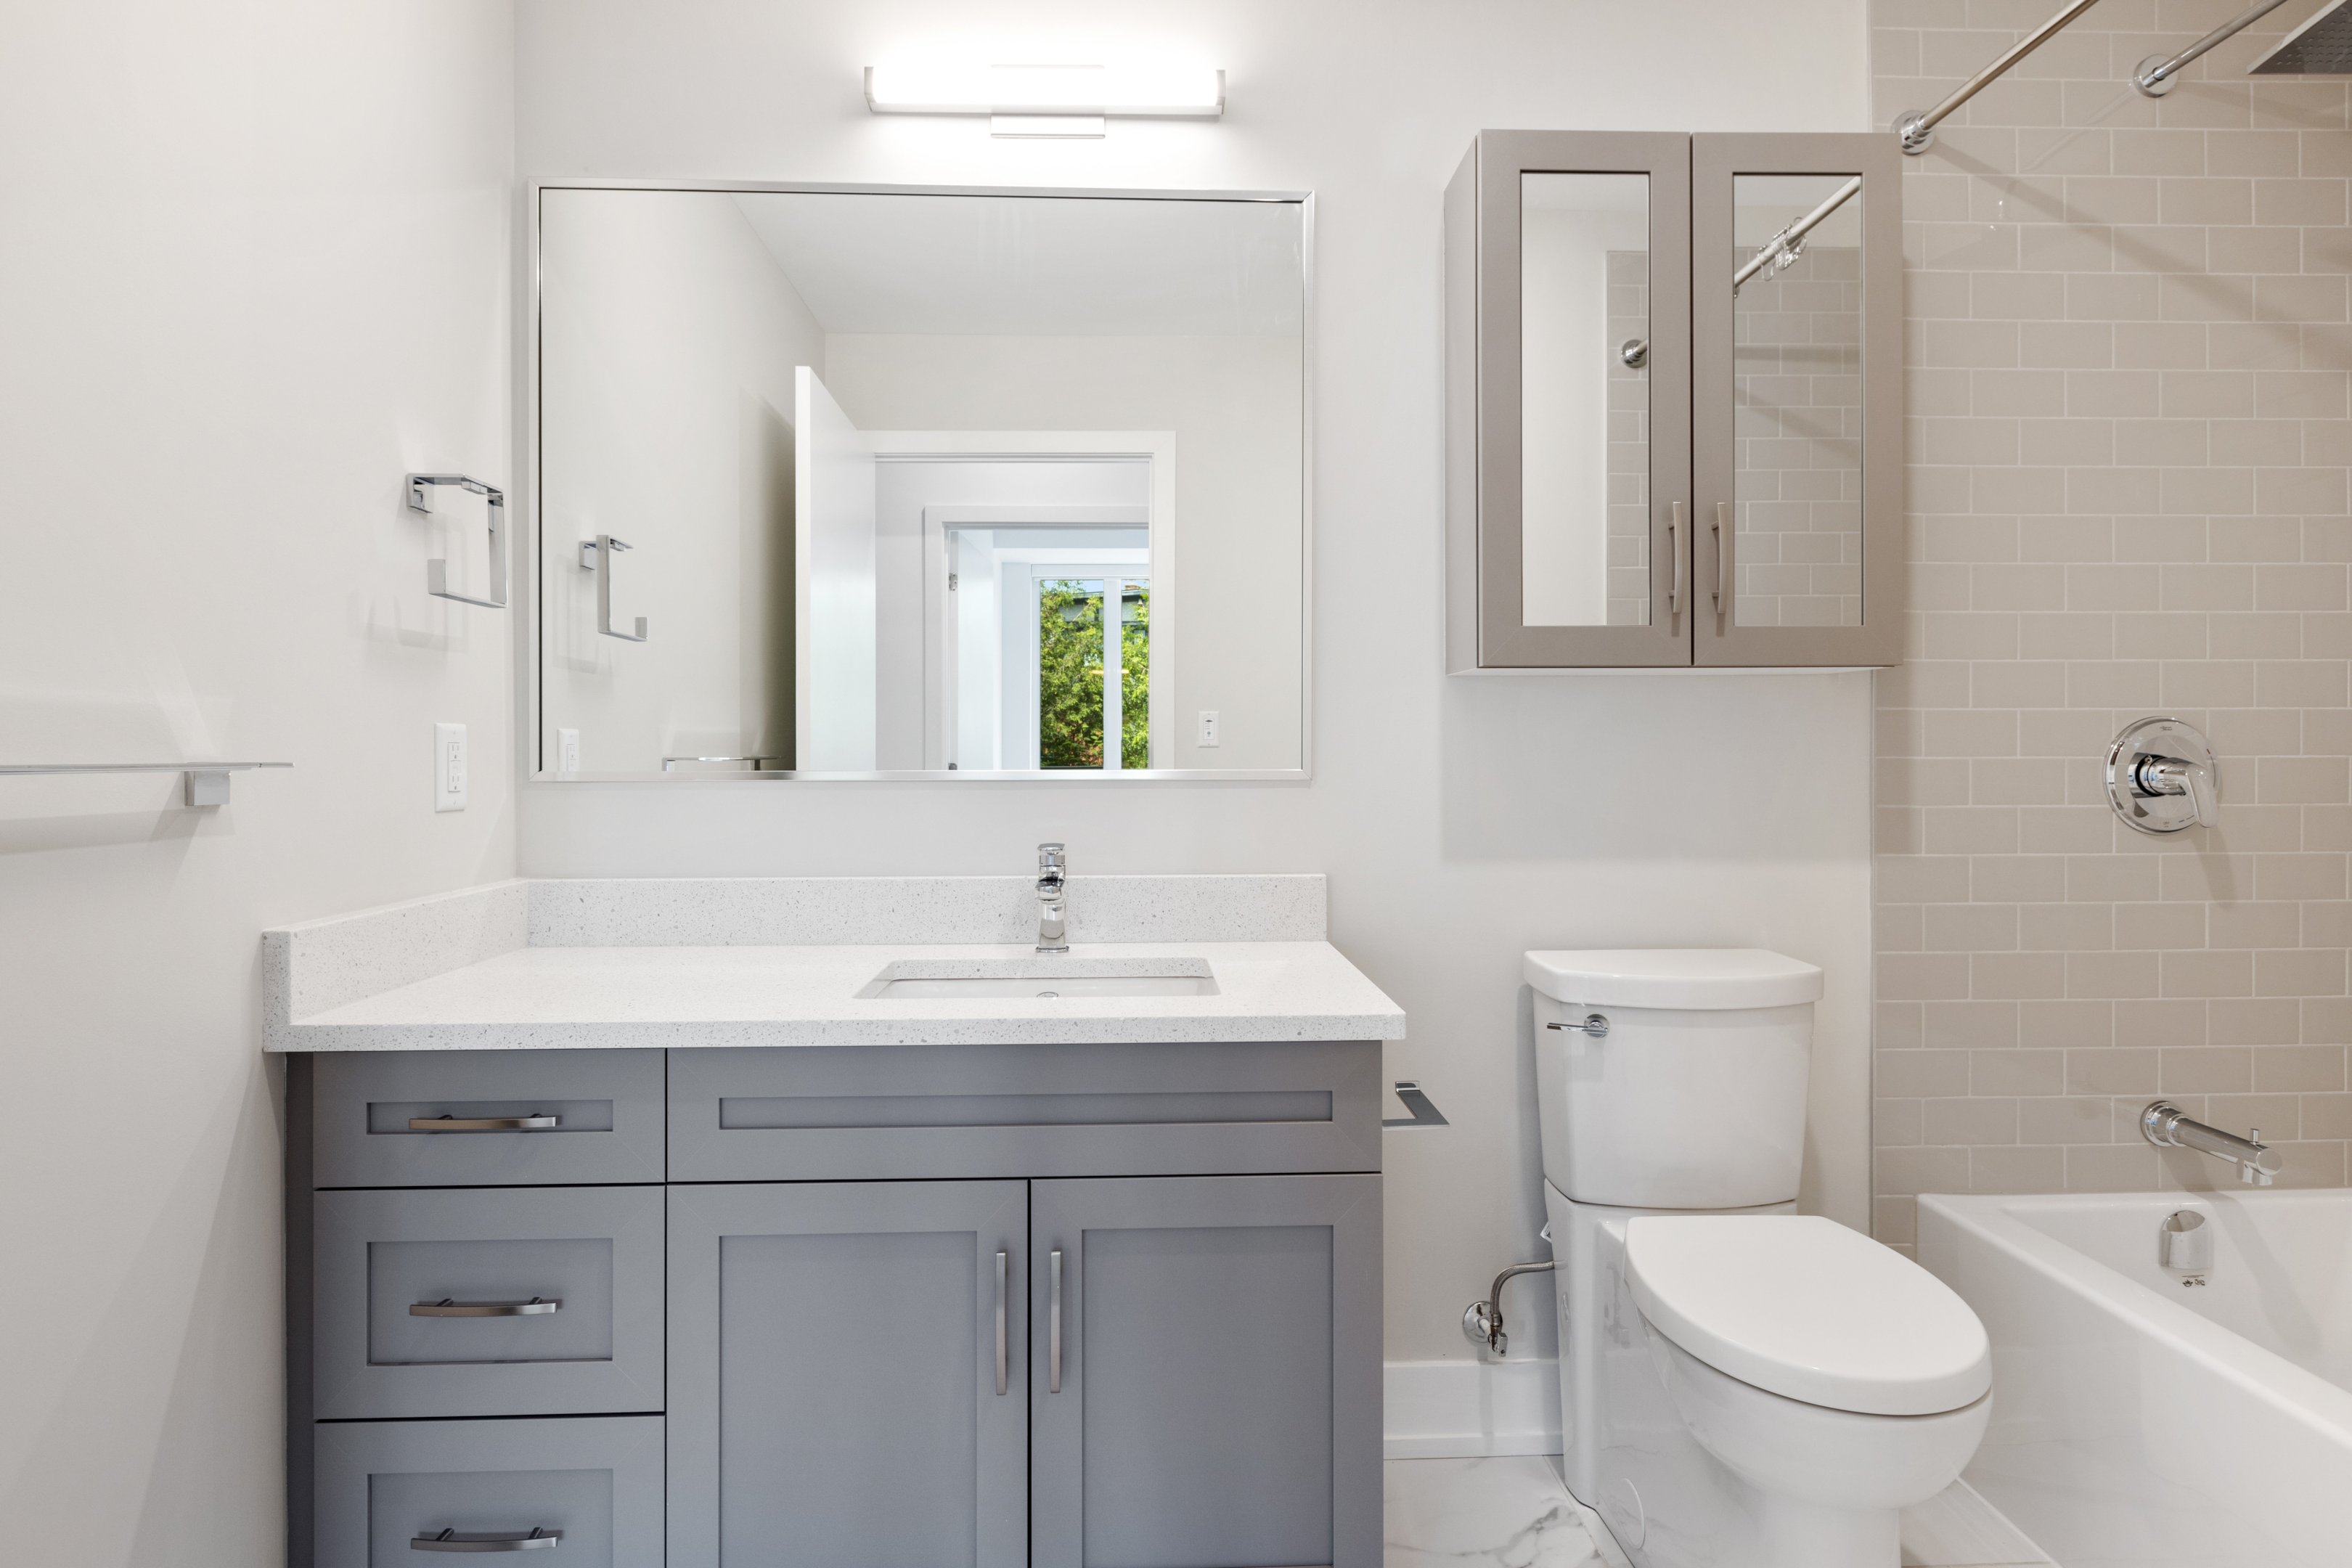
After:
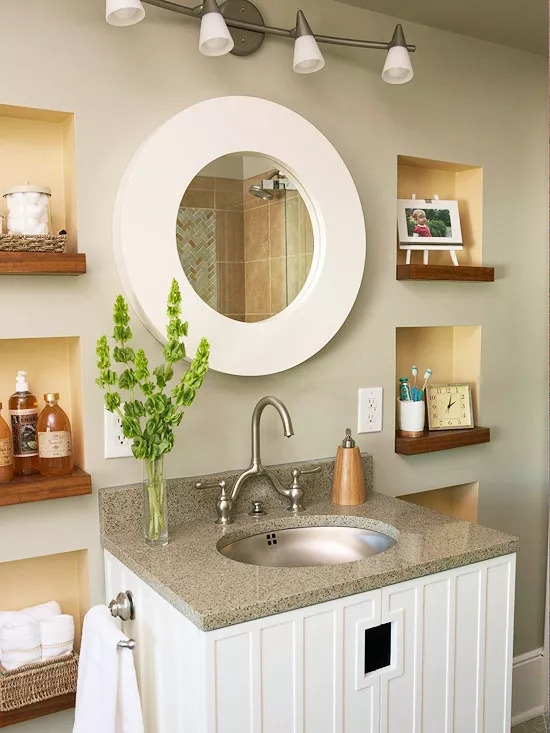
Image Source: bhg.com
After the problematic pieces were eliminated, the vanity area was given a spa-inspired makeover employing both hard-edged and fluid designs.
Storage and exhibition space are provided by square recesses cut out between wall studs, and a stylish round mirror breaks up the grid of squares. The vanity’s clean millwork features and curved faucet complement the area’s organic appearance.
6. Old and Outdated One-Day Bath Remodel Turned into a Young and Fun Bathroom
Before:

Image Source: bhg.com
A renovation was badly needed in this tiny bathroom that measured only 5 by 8 feet. The house was completed in 1928, and many of the fixtures and fittings are vintage as well, such as the cast-iron tub and tile flooring.
It was a simple room with a peeling imitation frosted-glass window, an old, gray porcelain finish, and practically any storage.
After:
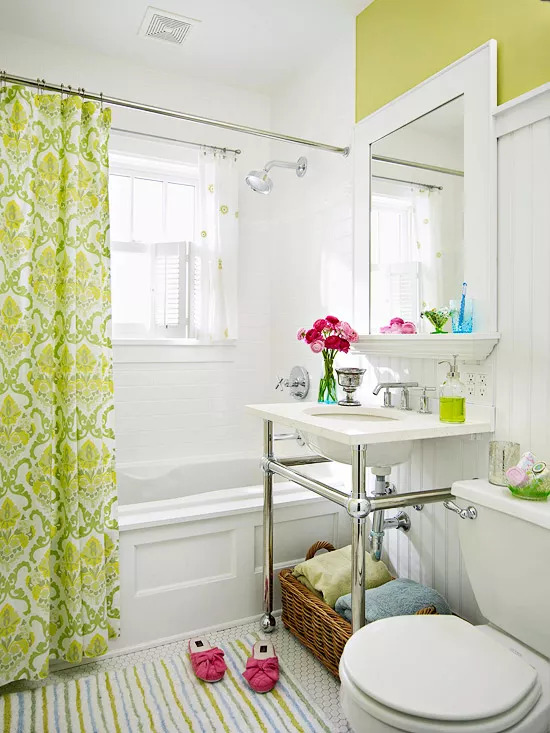
Image Source: bhg.com
The homeowners put the white beaded board, and traditional remodel all the way to the ceiling to create a lighter bathroom. The new vanity is the showpiece of the bathroom; it is constructed from the pipe the homeowners found on the internet, a block of limestone, and a drop-in sink.
Thanks to the bright paint, new furnishings, and modern fixtures, the room has a youthful feel. Mini shutters and cafe curtains provide some personality to a modern double-hung window.
7. Bathroom Troubled with Tiles Converted to a Vintage Charm
Before:
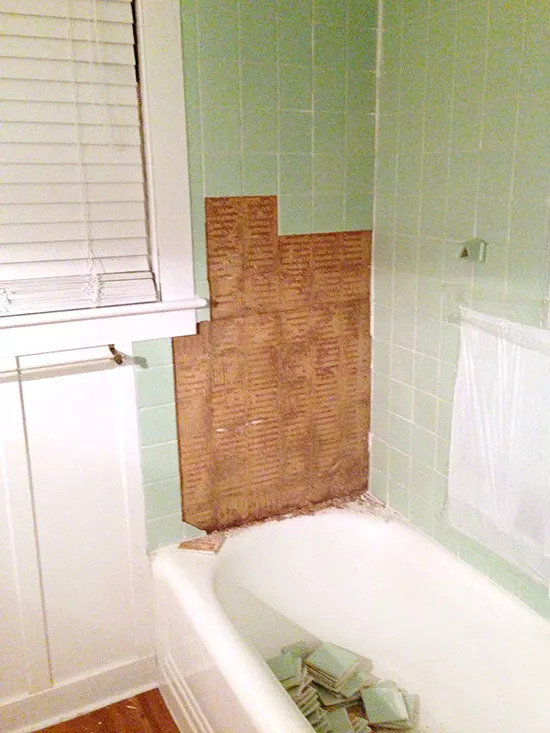
Image Source: bhg.com
There was a rescue operation in this bathroom. The bathroom was given a gorgeous makeover without wasting anything by removing, sorting, and then reinstalling half of the green tiles that were in good condition.
After:
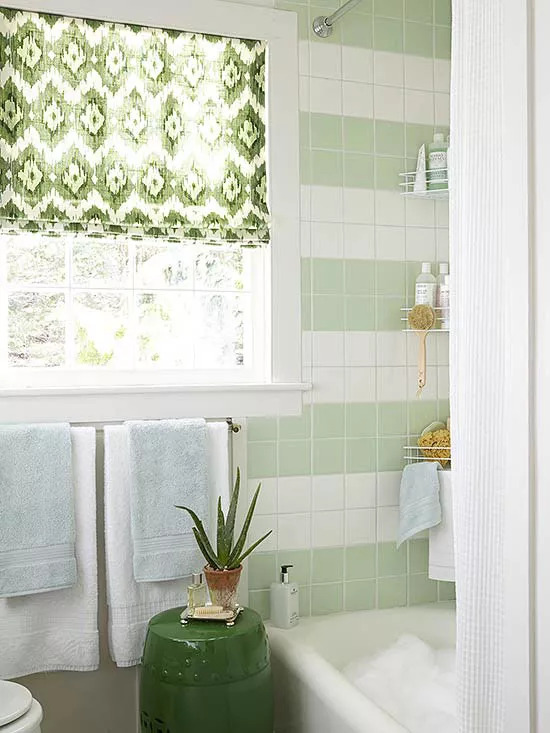
Image Source: bhg.com
Reclaimed green and fresh white tiles were used to create a modern striped pattern around the new shower and two-in-one tub.
The space has a peaceful and timeless color scheme created by the widespread use of white and green accessories. The bathroom benefits from a unique window covering that subtly filter light while maintaining seclusion, thanks to the design.
8. A Lackluster Bathroom Remodel into One Brimming With Style
Before:
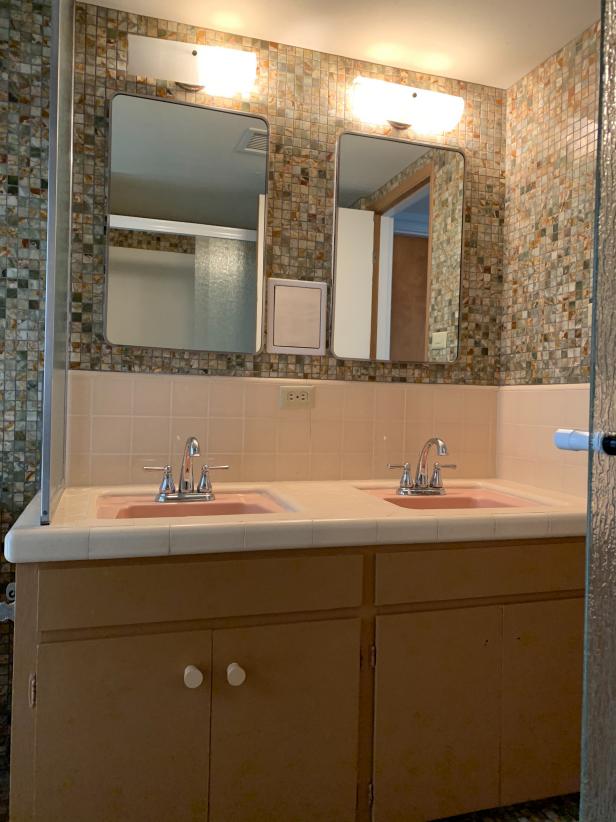
Image Source: hgtv.com
In the past, this bathroom had outdated tiling and inadequate lighting that let the room shine.
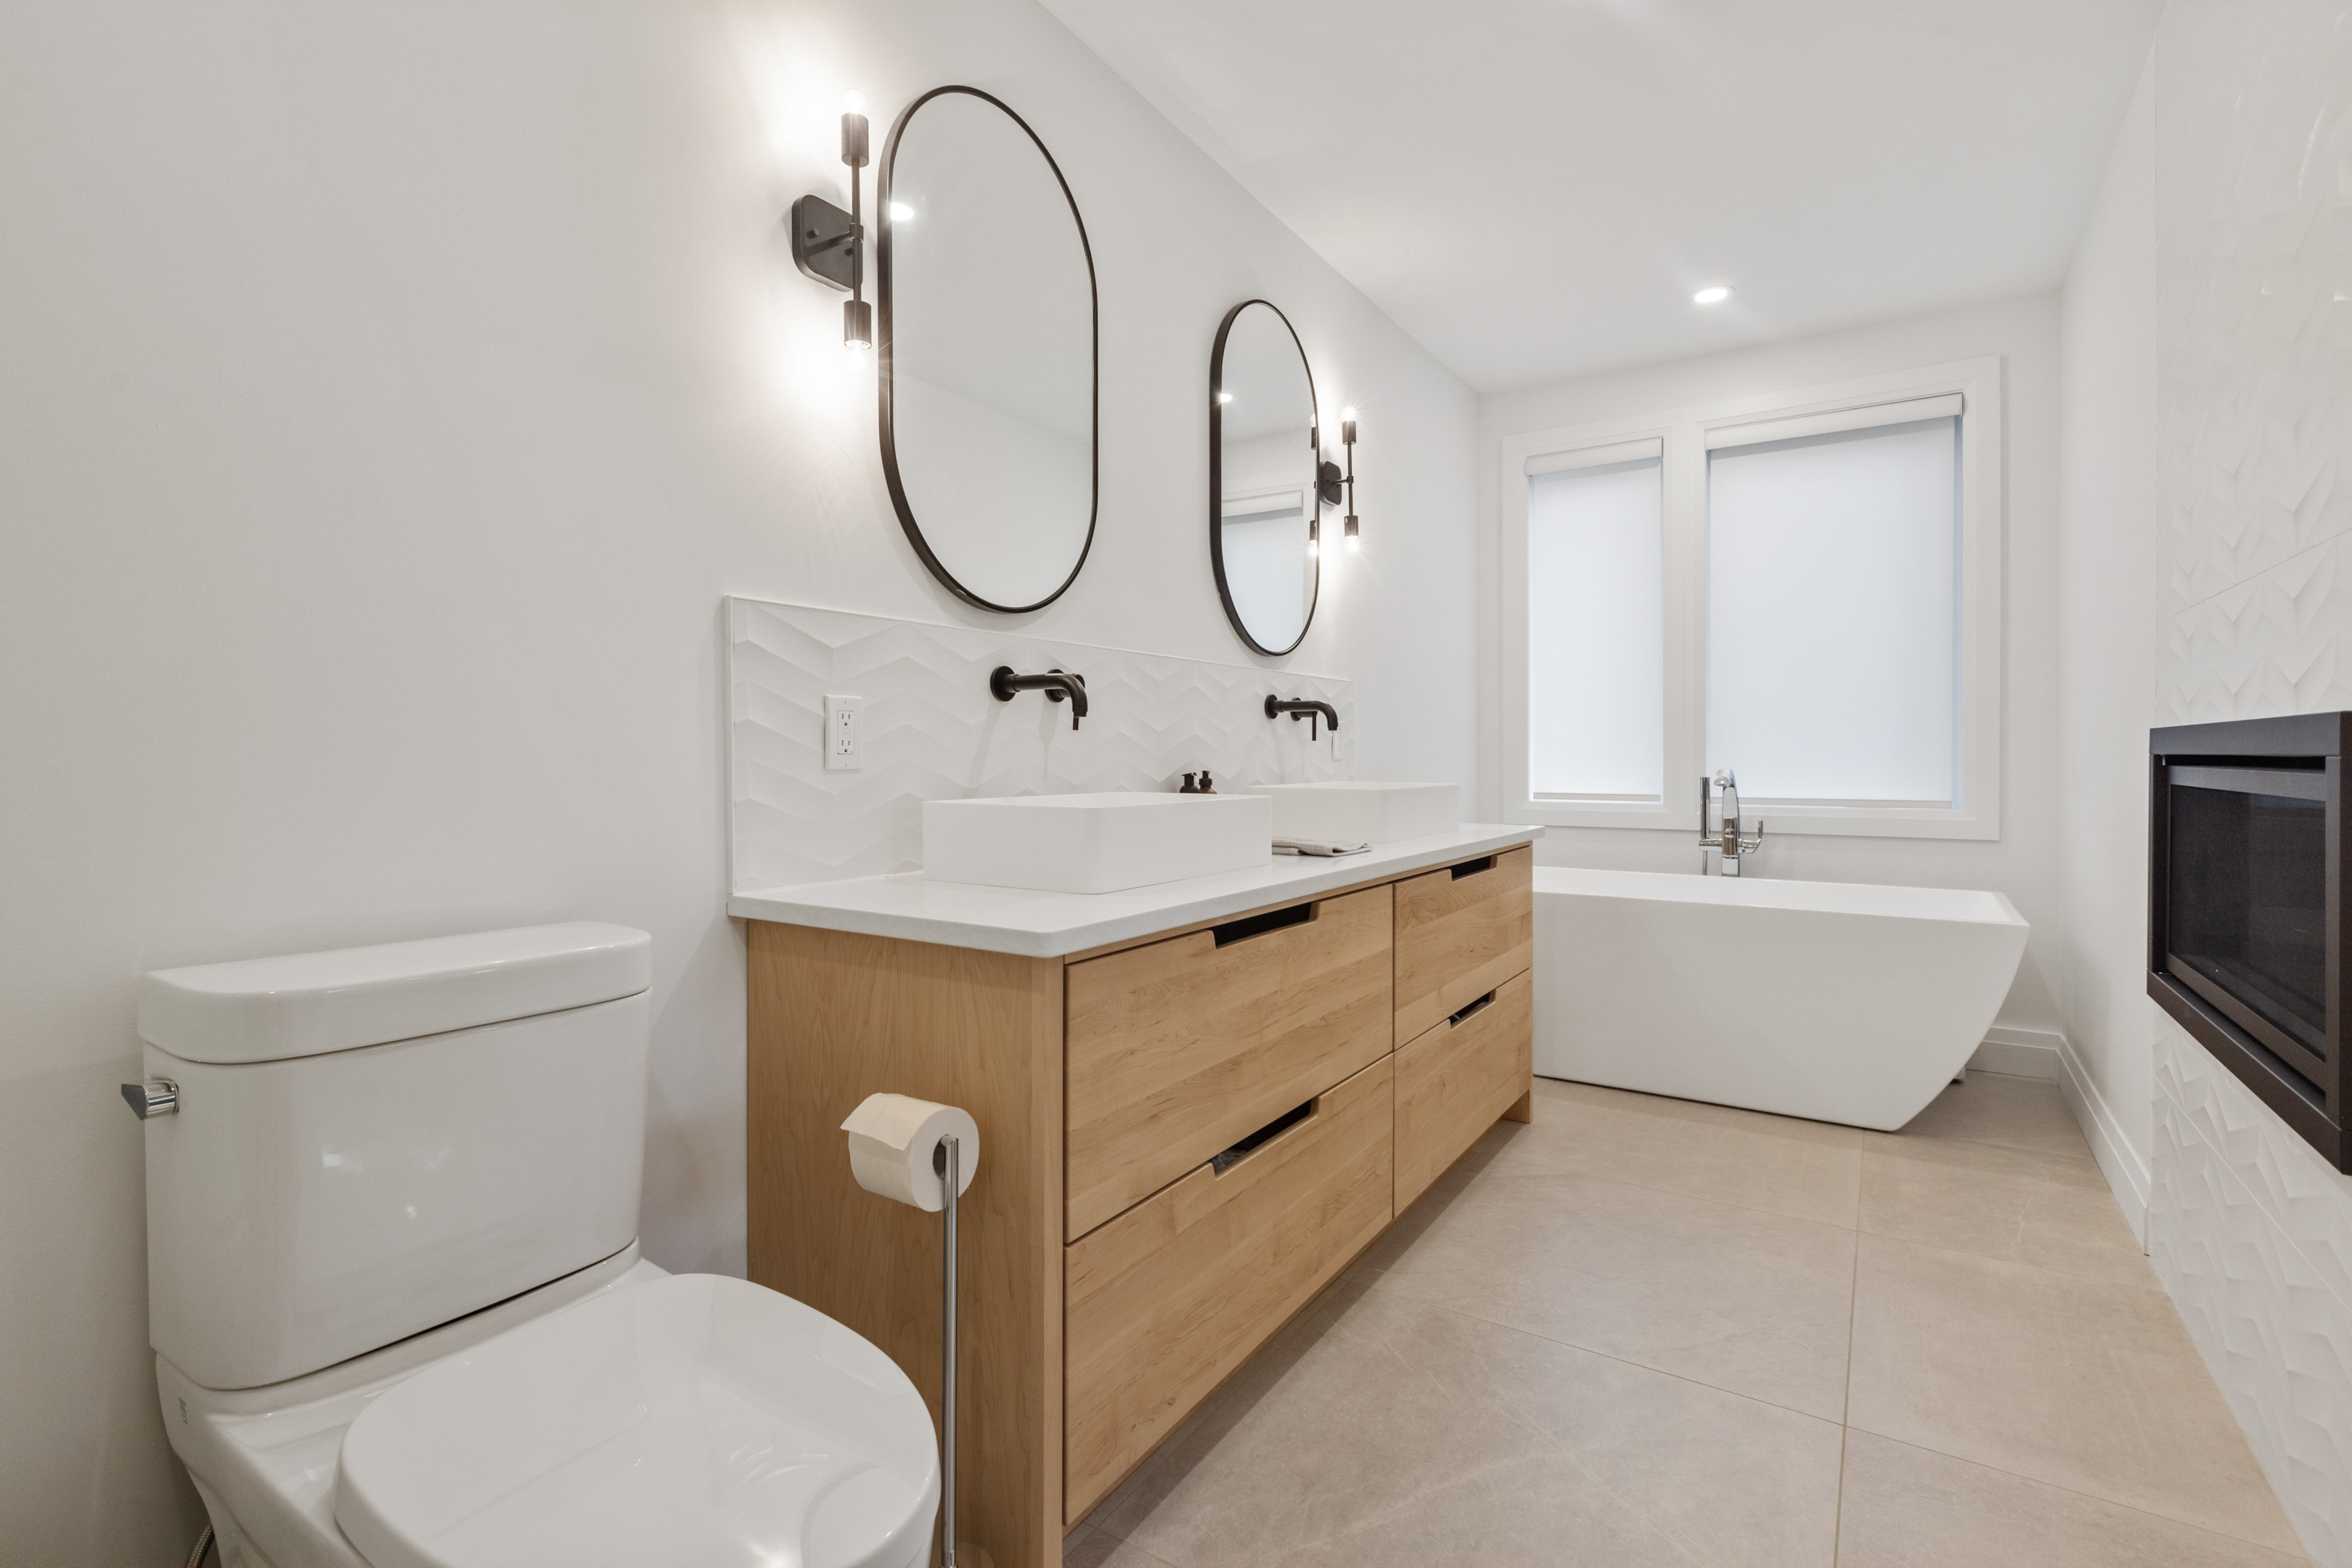
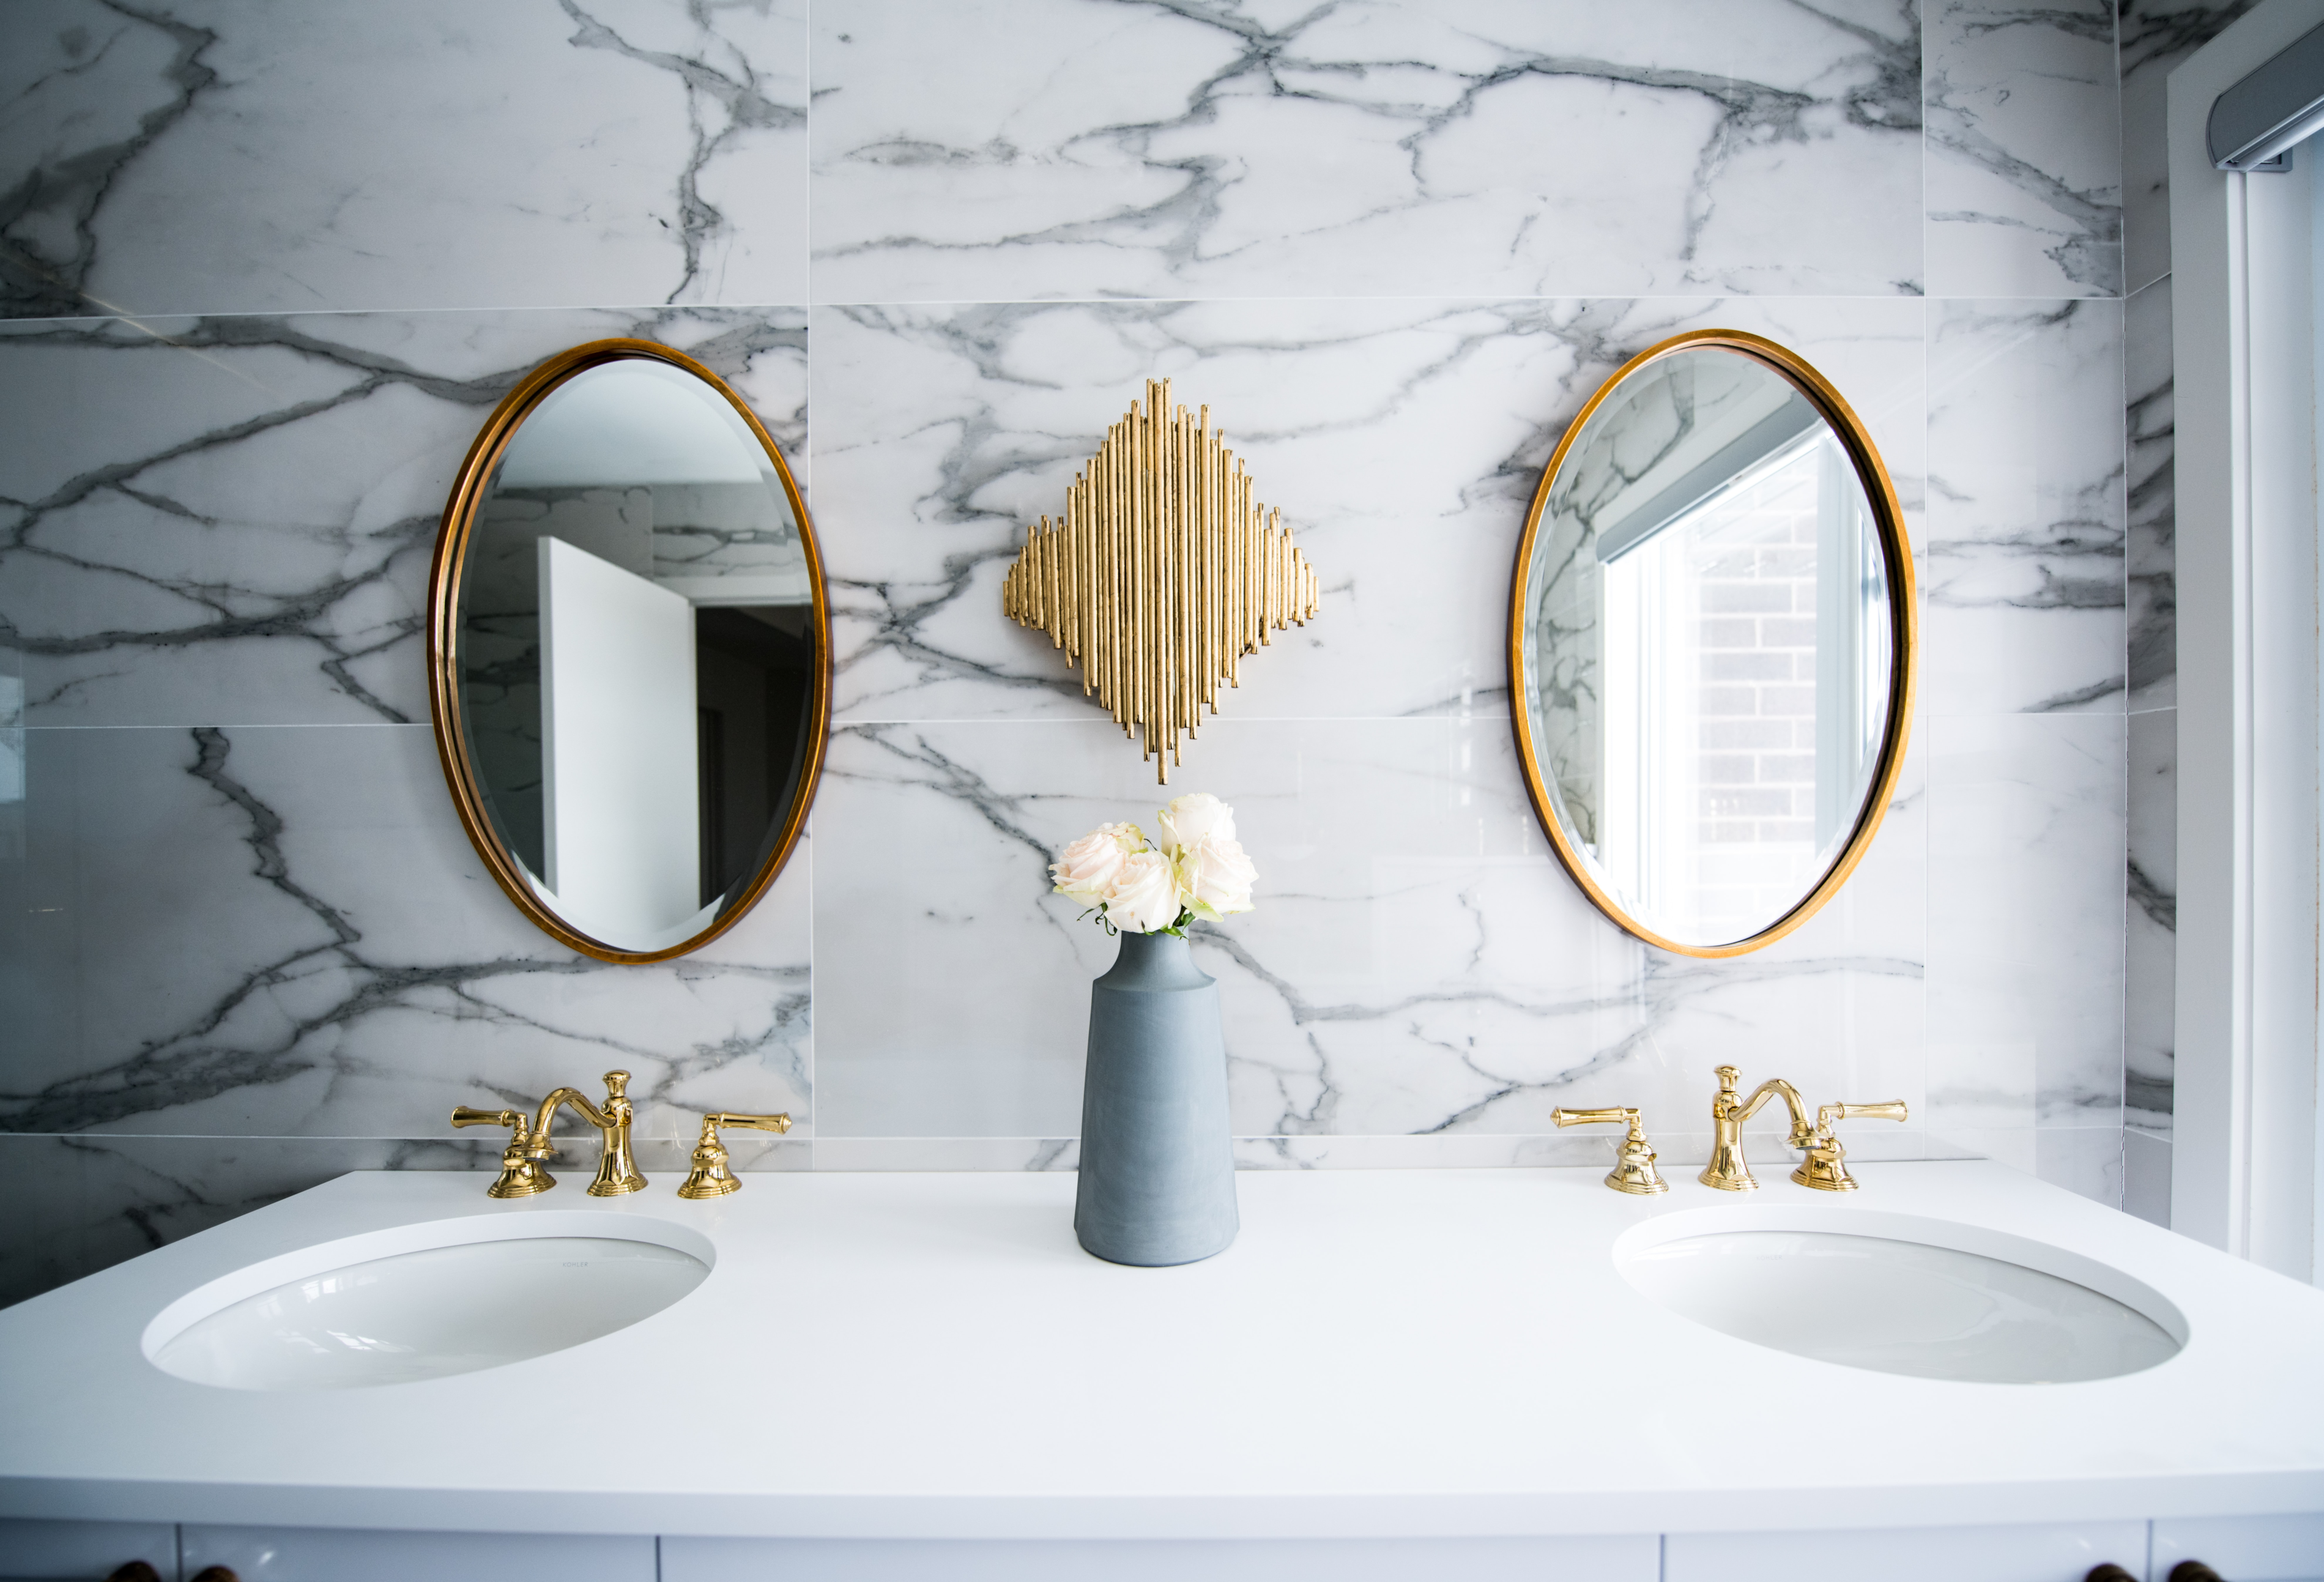
After:
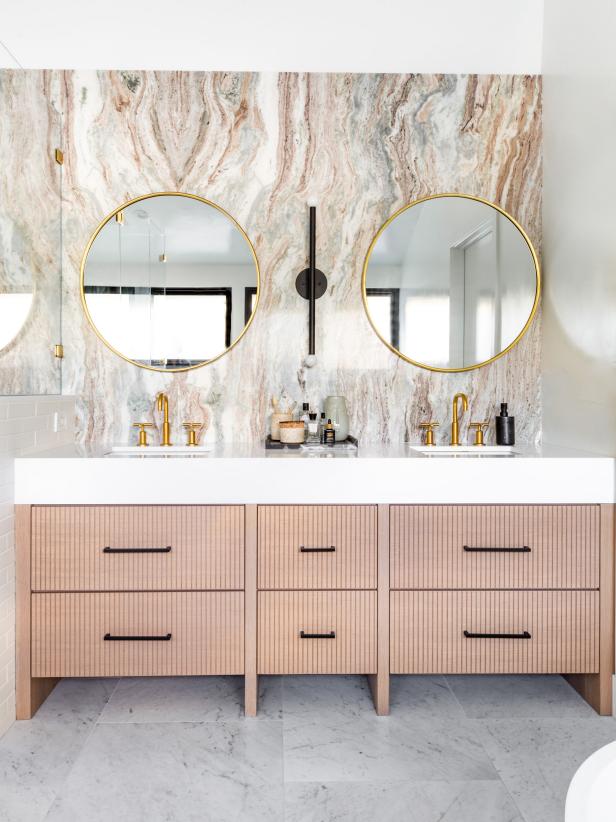
Image Source: hgtv.com
A marble backsplash adds a welcoming design element to the wall behind the double wood vanity.
Above the white countertop are a pair of identical circular mirrors, which, along with the gold sink fixtures, create a harmonious aesthetic. The airy room is anchored by black hardware and a sleek, modern black light bulb.
9. Minty Kids’ Bathroom Remodeled to an Ageless, Elegant, and Dream Bathroom
Before:
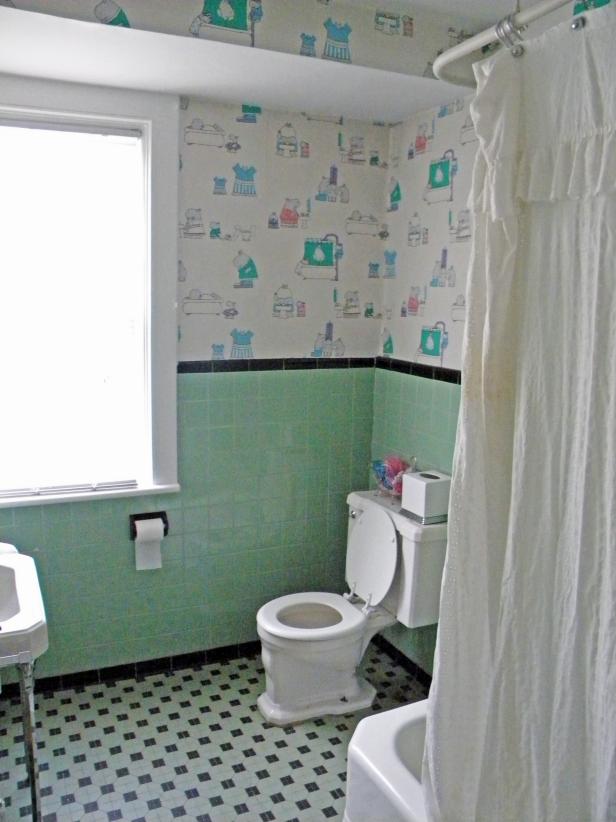
Image Source: hgtv.com
Tiles in an outrageous shade of mint are coupled with wallpaper featuring whimsical drawn animals in a throwback design for a kid’s bathroom. The bold wall tiling was too much for the room and didn’t allow the new homeowners to express their sense of style.
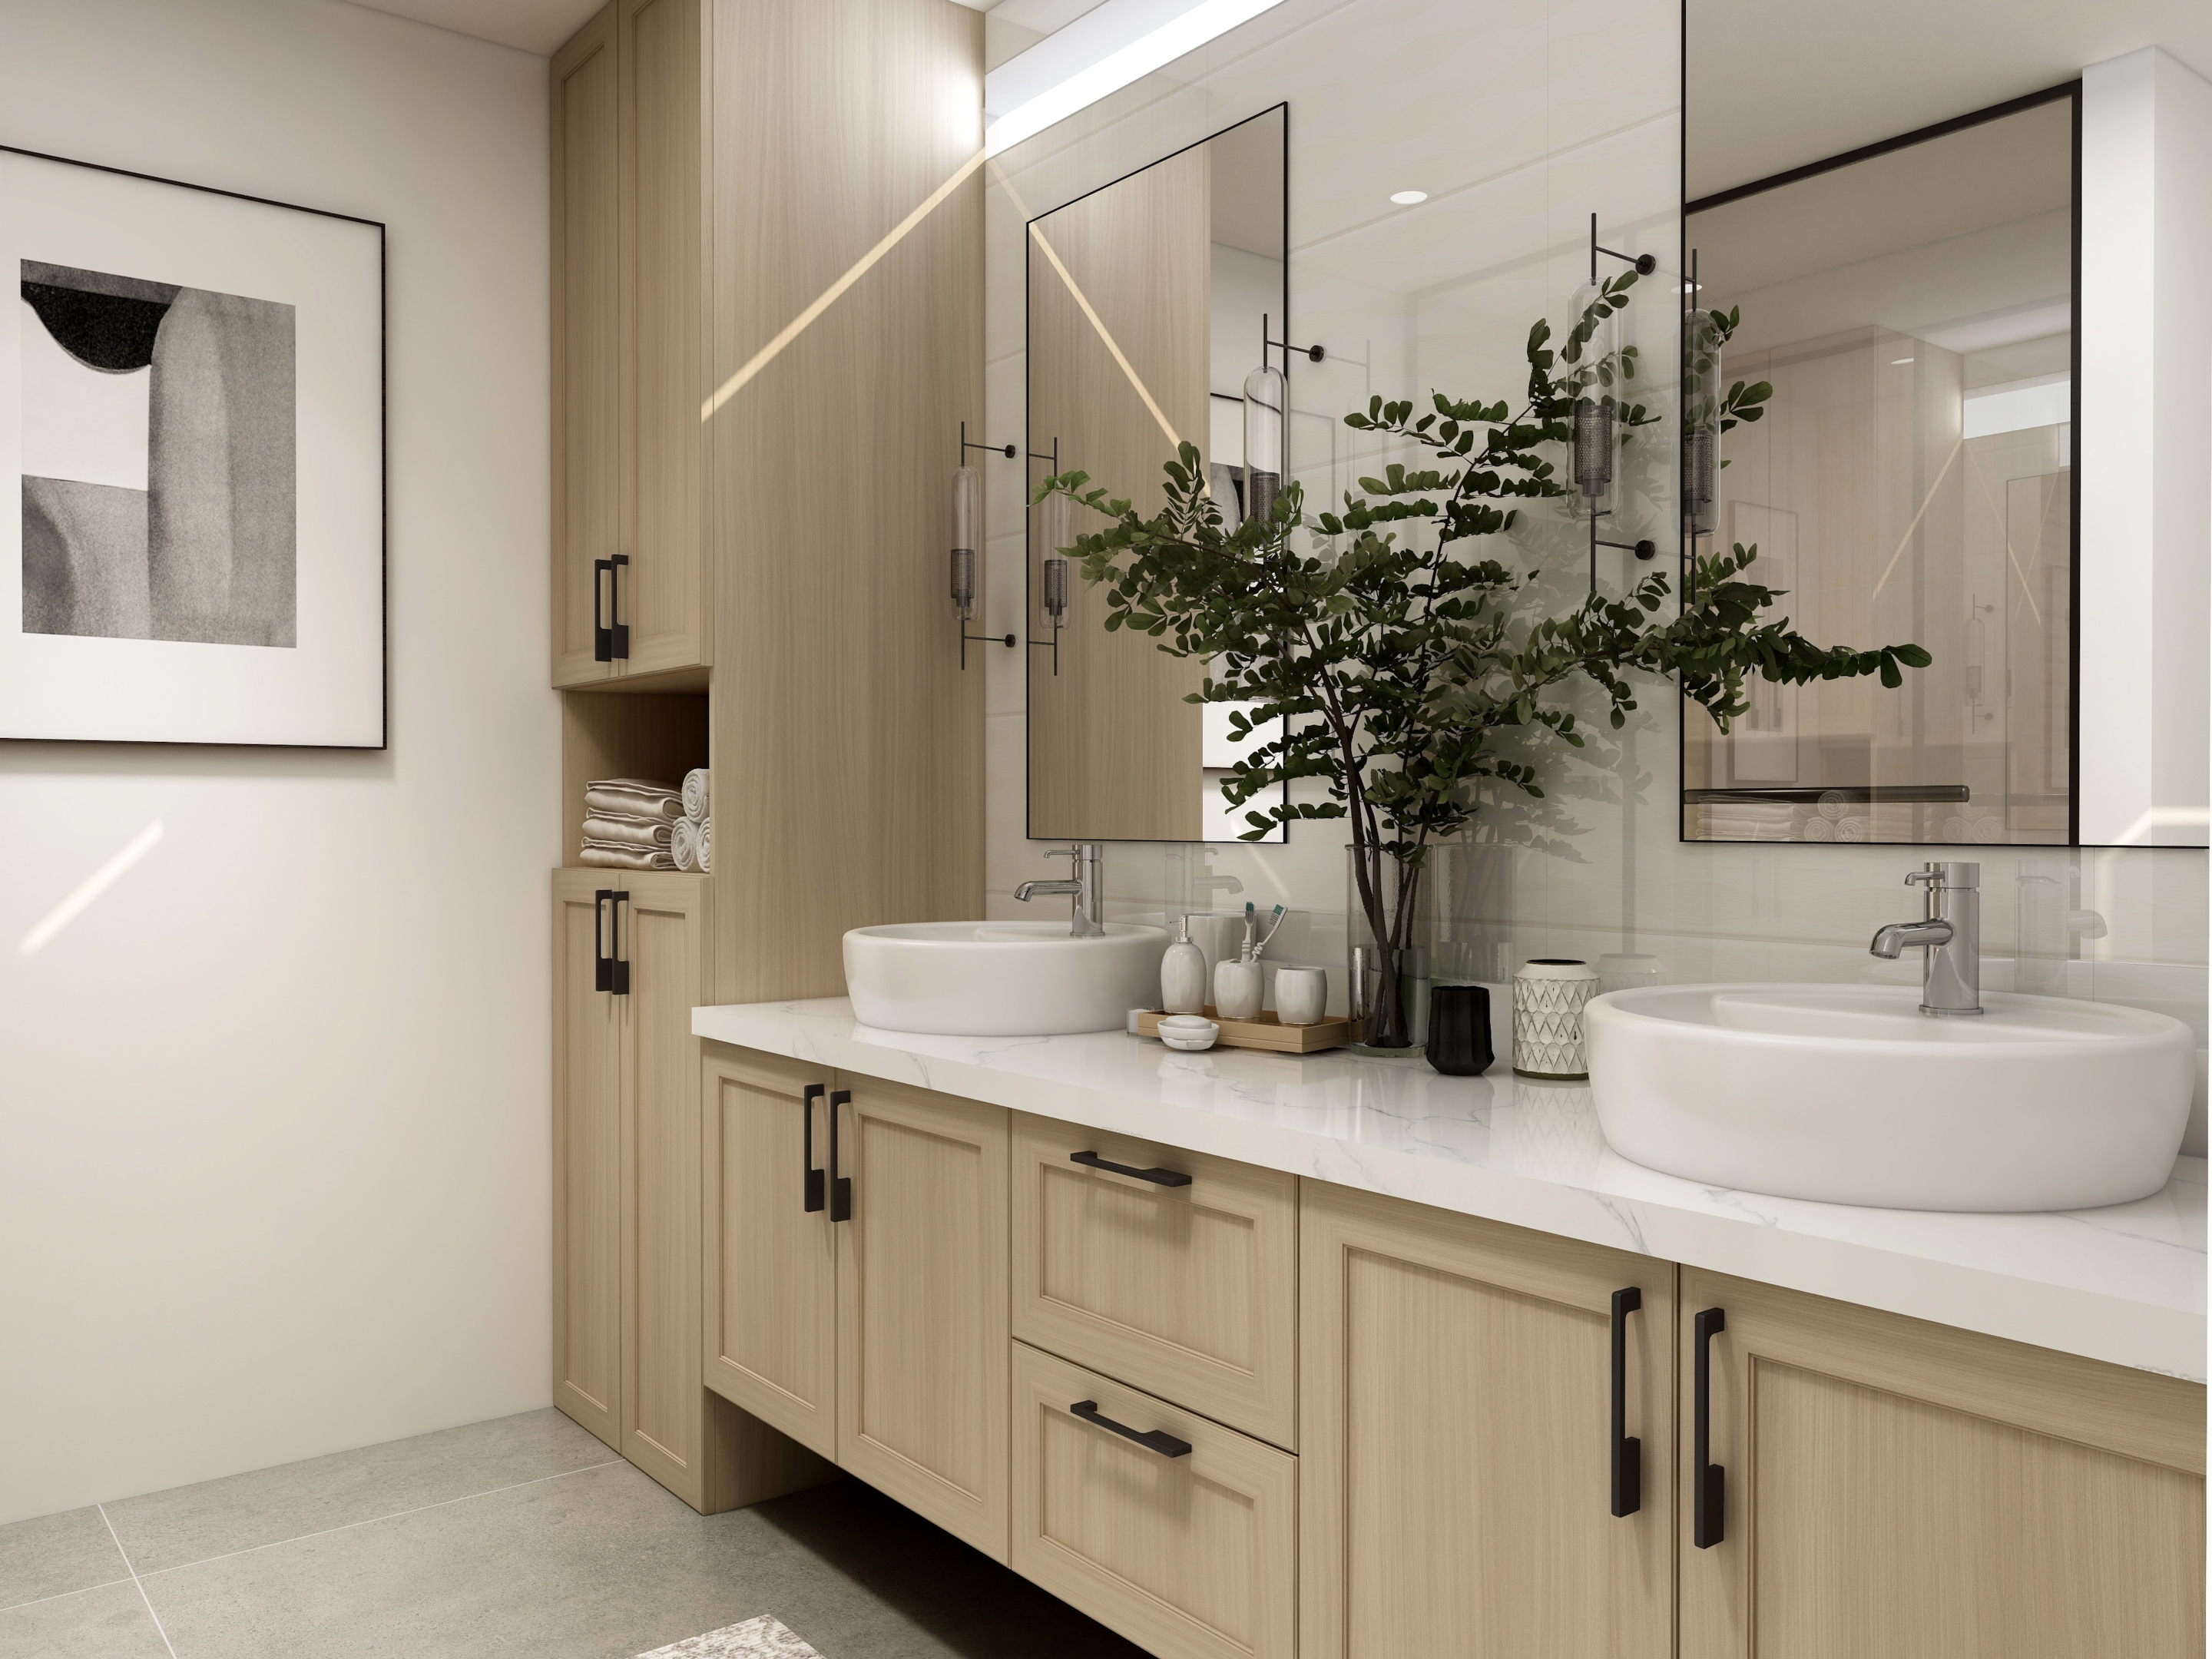
After:

Image Source: hgtv.com
The bathroom looks completely new thanks to the replacement of the green tiles and illustrated wallpaper with classic marble subway tiles and white paint.
The new tub is enclosed with frameless glass doors for a clean, contemporary aesthetic, and the antique wall-mounted sink was swapped out for a useful storage vanity.
10. A Dated Bathroom Design Renovation to an Enhanced Classic Design
Before:
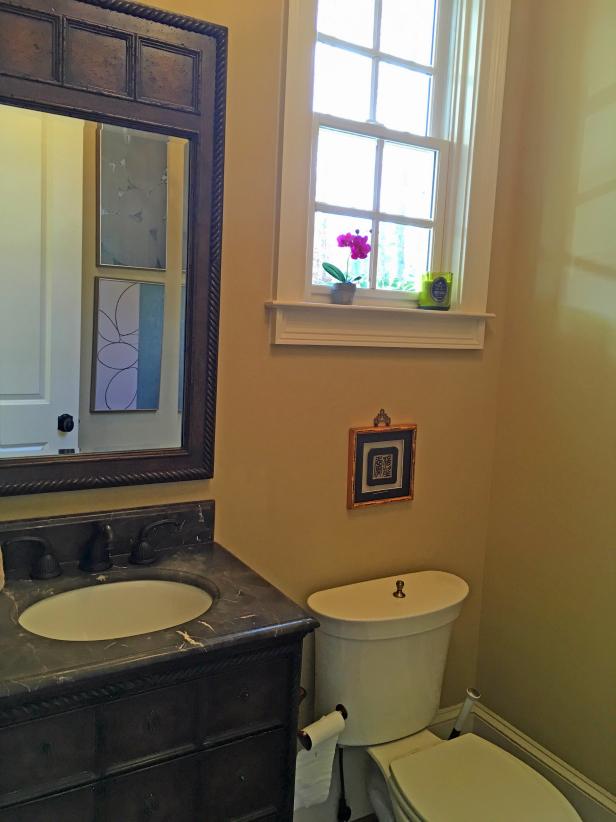
Image Source: hgtv.com
If you can overlook the bathroom’s archaic decor, you’ll realize that it’s quite charming and full of character for its size. The massive window trim and baseboard begged to be noticed among the outdated finishes.
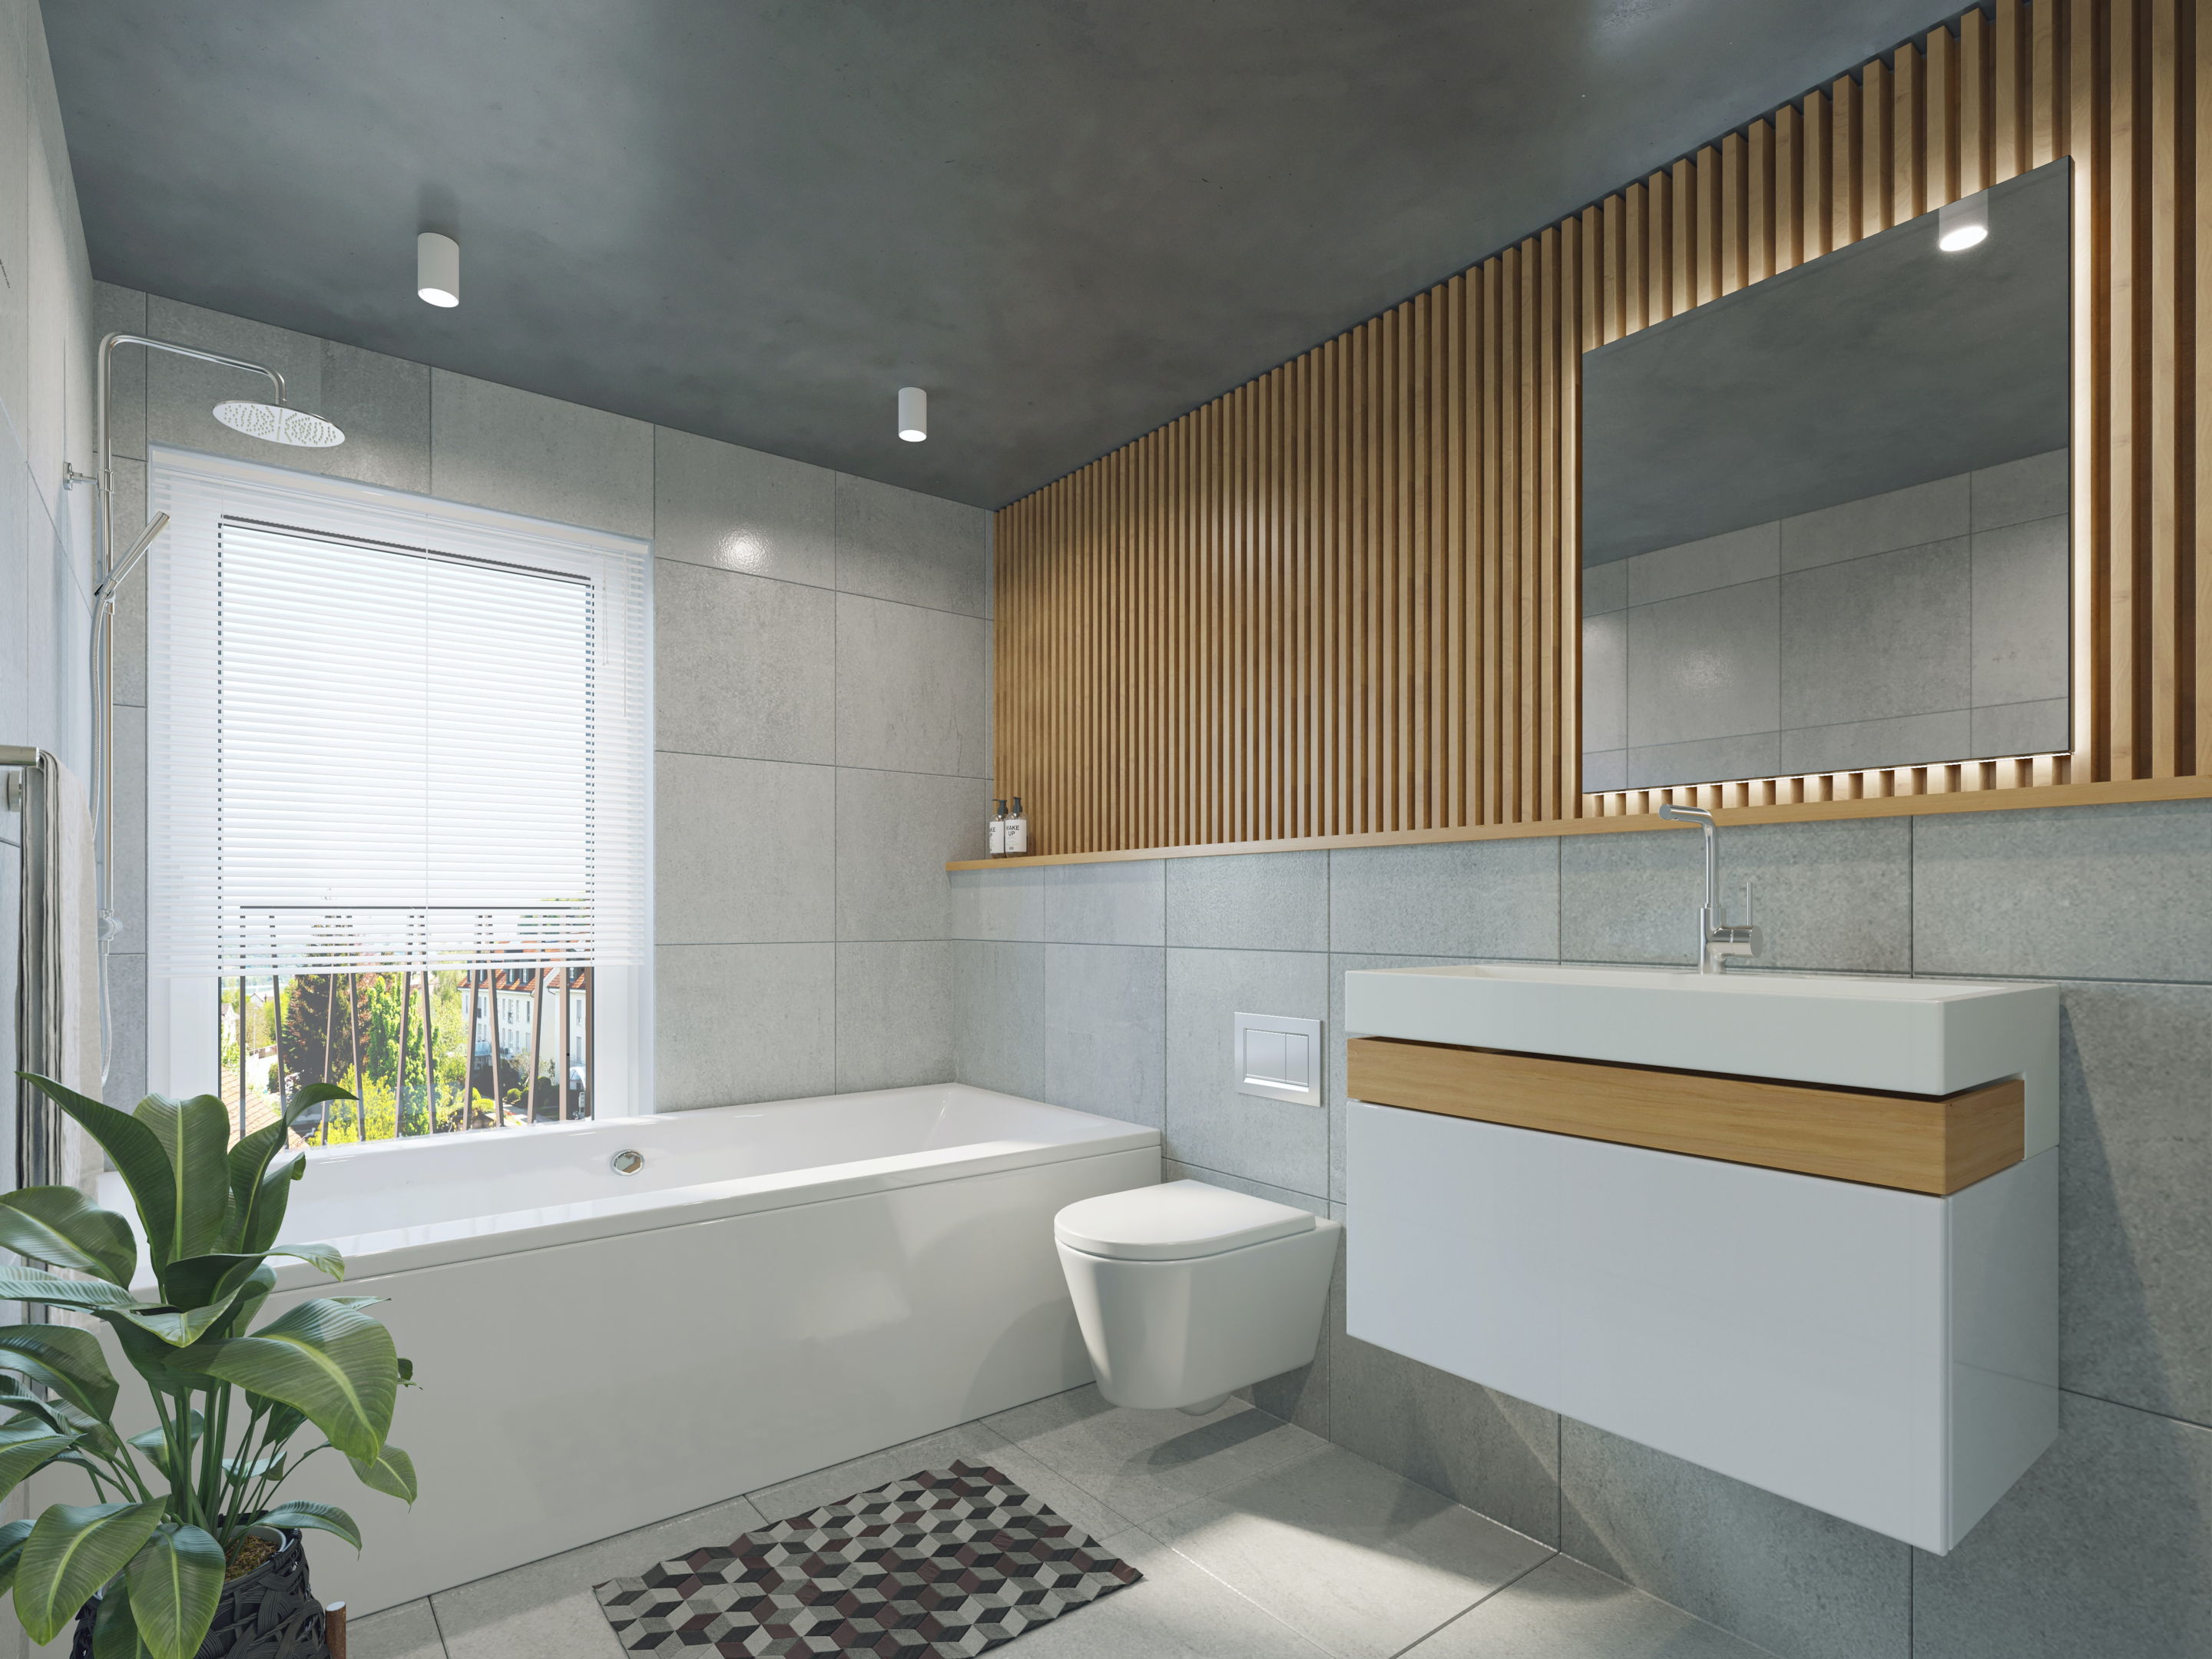
After:
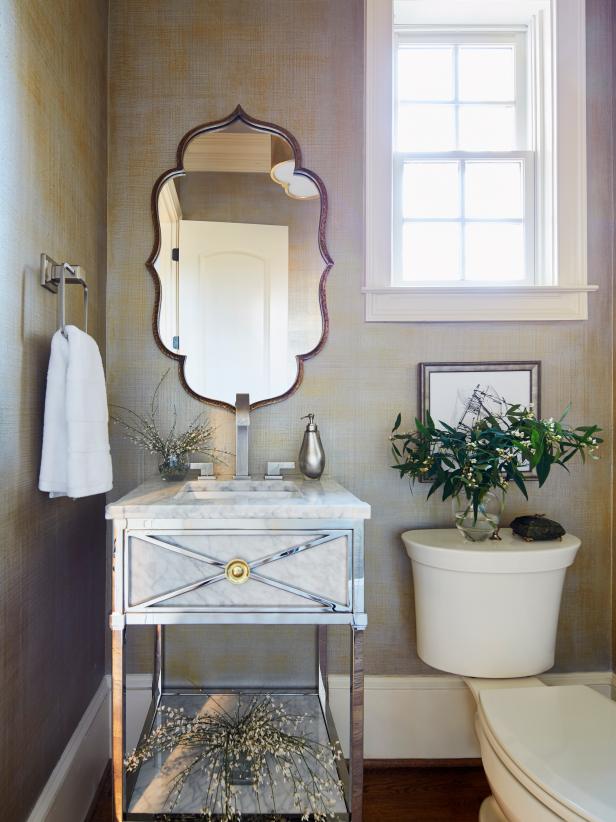
Image Source: hgtv.com
With a small marble-top vanity, textured wallpaper in a neutral color, and a quatrefoil-shaped mirror, interior designer Minhnuyet Hardy completely altered the bathroom. The original millwork now glows in the room and adds to the classic feel of the design after receiving a fresh coat of white paint.
Cost for a One-Day Bathroom Makeover
If you were remodeling your bathroom in a single day, how much would it cost? The final outcome will depend on where you live and the size of the bathtub or shower you wish to remodel.
HomeGuide estimates that the average cost of a bathroom remodel in 2020 will be between $8,000 and $15,000. However, the cost of a bathroom remodel can vary widely depending on factors such as the property’s location, the size of the existing bath, the bathroom remodeling firm chosen, and the scope of the work to be done.
The average cost per square foot is between $150 and $375. The remodeling business you choose and the area you live in will determine this.
Remodeling small bathrooms often cost between $8,000 and $10,000. (shower areas). The average 5 feet by 7 feet bathroom will cost between $8,200 and $11,600 to rebuild the shower area if you hire a professional.
It’s reasonable to expect that a one-day bathroom remodel will cost less than the average cost of bathroom remodeling in the country.
Your old appliances will still be used, so you can save money on a bathtub or shower that looks brand new. Showers with acrylic surrounds can save you a ton of money compared to those with tile walls.
These one-off services have different prices from business to business. Before committing to a one-day renovation, getting a quote is a good idea. It’s vital to keep in mind that the “one-day” makeover may take two or three days due to California’s permit procedures.
Conclusion
The basic principles of a one-day bathroom remodel have been taught to you. First, it’s critical to have a bathroom design that expresses your personal preferences and sense of style. The next step is to schedule your one-day bathroom renovation by giving a remodeling agency a call.


