Any RVer, or someone planning to become an RVer, will quickly come to learn that power is inevitable. Power is needed in an RV to drive various systems well and to check that the heaters and coolers are functional to provide comfort in the RV. Appliances in RV, air conditioners, fridge, and many other appliances would require a proper supply of power. Your RV batteries should be healthy and charged at all times and at some times you will find yourself needing external power to draw the power needed.
In order to be able to tap into an external supply, there are few important aspects that one has to understand about the RV as well as the supply link. Also, you have to consider the working of the 50 or 30 amp RV plug wiring as well to some extent. Before you get to the end of this article, you will be well equipped with the information to effectively guide yourself through wiring your 30 amp RV plug.
What You Will Need
There is number of tools and materials that you needed to complete wiring if you want to do the work successfully. First of all, this should be started with from the right wire size up to the right plugs. After learning how many watts larger tent trailers or smaller tent trailers need, you’re set. Following are the things you will require.
- Electrical panel box
- 10 gauge wire
- Wire stripper
- Correct wire size
- Correct size breaker panel
- Cover plate for the outlet
- Staples to protect the wires
Ensure you get the correct materials for the plug to be connected properly.
Steps to Follow When Wiring the 30 amp RV Plugs
Know Your RV’s Needs
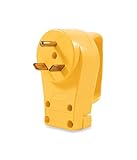
As we have pointed out, your RV will require a 30 amp plug most of the time. After knowing your RV outlet, you will know how to move on with wiring the RV. A hookup for the RV will have a 120-volt three-prong male connector and a Breaker Box will have a 30 amp input assigned to it. The plug is intended for most, if not all, trailer and recreation vehicles. The 30 amp RV socket is called the RV-30.
If you need to recognize the plug by referring to it, you have to know something about it. The electrical plug cap has two flat pins and one shaped like a U; The two flat pins are usually at an angle to the other. That is, the color code you are required to follow is on the jacket cover of the cord. The color codes are designed to assist you to know which cable should be connected to which position when making a connection. Its main goal is to deliver the power to the RV and this cannot happen if the cables are crossed. Be very delicate when picking the wires to be able to make the best outcome without having to redo the whole process because of the ripped wire stripper or any other issue.
This task can be easily done with the help of your home tools and with the appropriately chosen wire size. As a reminder, this is a good practice to use all the new wire you have kept. Do not use the wires in order to make a new connection.
The Steps...
Follow the steps carefully and consciously; do not hurry. If one connection is done wrong, then you can easily find yourself saying bye to your favorite appliances in the entire RV. You don’t need any additional accidents that you can prevent by making the right connection when wiring a 30 amp plug.
Step 1:
Use a box cutter to remove the jacket cover of the cord thereby exposing individual wires to be used . Make sure you trim the wires carefully by avoiding cutting the insulation of the individual wires present. The wire size should be ideally of a length of three inches. Each of the wires should be kept at a considerable distance from the other. However, insulation of each of the wires should remain isolated in order to prevent short circuit in any form. It has many volts on the electrical outlet and anything that short circuits will lead to a lot of problems.
Step 2:
Use a wire stripper to strip off the jacket of each wire to expose just enough for a connection to happen. About half an inch of naked wire is enough for a connection to happen. You do not have to strip a large portion of the wire to avoid naked wire contact. If the wires have strands, twist the strands so that the wire is strong and neat. It will save you time if you have a neat setup.
Step 3:
Try as hard as possible not to damage the brass pins as you remove them from their housing. Avoid trimming the brass pins at all costs. Instead, unscrew all the fasteners of the TT-30P and draw the brass pins ever so carefully.
Step 4:
It is time to put the color codes to use. The RV outlet will have to be connected correctly, and the color codes are there to help you know which wire goes where to avoid any wrong connections. The cables are coded black, green and white. The black cable is the hot wire. The green cable is the ground, and the white is the neutral wire.
When connecting the wires, you need to connect them to the corresponding screw. The screws hold the wires in place as you connect them. The screws are color-coded to indicate the correct position where the wire needs to be connected. For example, the white neutral wire goes to the silver-colored screw. The black hot wire is to be connected to the brass-colored screw. For the ground wire, there are two options. The first option is to connect the wire to a green-colored screw. In some cases, the green screw is nonexistent. The green wire is connected to the u-shaped plug in such a case. The u-shaped plug is the ground prong in most cases.
Step 5:
You may have all the connections done correctly. However, if you miss this step, you may end up ruining the whole connection. The wires need to be secured tightly to avoid any bare wire touching the other. A few things can be avoided by just being cautious. Extreme caution has to be taken when dealing with electrical panel connections or any other connection that involves electricity.
There are small straps on the cord's cover jacket top side. These straps are meant to secure the wires to avoid any unwanted situations. Remember, this step is key to ensuring the RV outlet is well catered for. Ensure you use enough wire to avoid straining any connection points.
How to Save Electricity in an RV
After you have figured out how to power your RV, you need to know how to use the power efficiently. You already know how many watts you use in your RV, and it is time to use your appliances wisely to save on the power so that you do not have to keep going for refills all the time to get your batteries charged.
1) Cover the Vents
One of the main consumers of power in the RV is the air conditioning. You want to keep inside of the RV comfortable for your stay. Regardless of the weather, you still need air conditioning. However, there are ways of going around the situation when you want to same the amount of power you will use on the air conditioner. One of the ways is covering the vents with pillows if it means keeping the RV warm inside. The other way is visiting an RV store and buying vent covers that will help keep the heat inside. The vents can be a huge factor in the temperature changes in your RV, and hence a huge cost factor in the amount of electricity you are using.
2) Insulation
One of the most common ways of keeping a house or a room warm is by having enough insulation. You can buy or replace insulation if you have to. Insulation will save you lots of money because it will care for your temperature needs. In deep winter, you will need more than just the air conditioner. You can add insulation to the inside wall if your RV does not have one already. There is insulation specifically made for RVs, and you need to find the right one. At first, this might seem costly, but you will realize the benefits as time goes.
3) RV Skirting
RV skirting takes care of the air passing below the RV. The skirting creates air insulation beneath the RV, keeping the vehicle warm. The skirting will form a pocket of air beneath the RV, adding to the general warmth and reducing the cost you would, in turn, use in paying electricity bills. Whether you are on a camping trip or living in an RV, this is one of the tricks that will sustain you for a long time. You will have enough electricity to run other appliances without worrying about anything else.
4) Choose Your Locations Wisely
Different states have different rates. If you stay in a state for a long period, the electricity costs might be included in your monthly bills. If not, the costs might be included in your general fees. If you plan to travel over long distances, you need to be aware of the outlet fees and how the system works. In addition, you need to know the points where recreational vehicles are recharged. Having that extra information will save you a lot of inconveniences that you can avoid by simply having information.
5) Solar
Solar is one upgrade that will be costly in the short term but convenient in the long term. Solar panels can save you trouble and money if you own an RV. In addition, the sun is a free source of energy that you can surely take advantage of.
The other trick is to always park either in the shade or the sun. If you need more heat in the RV, park in the sun. If not, you can park in the shade, and your RV will be cooler than if you pack it in the sun.
Best 30 Amp RV Outlet Plug and Accessories
i) Best Rv Outlet Plug
Camco 30 Amp Rv Outlet Plug Replacement
- For replacing 30 AMP plug on extension cord
- Convenient pull handle
- Handles are molded and made of heavy duty Polyvinyl plastic
- Measures 4.4" x 2.6" x 3.8"
- Patent pending
Camco is the solution to most of your problems when it comes to connections when servicing most fifth wheels or pickup campers. The plug works perfectly for your RV as well. If you create a new outlet, you will need a plug with the correct plugs to match your cord. The outlet plug is the best 30 amp RV service available out in the market, making your electrical work easy and efficient. You will see where to connect the neutral, live and ground wire on the plug. The plug has a u-shaped pin to clearly show you where the ground wire goes. Camco is the perfect plug for your RV service needs.
Pros:
Cons:
ii) Best Cable Replacement
Cable Matters 3-Prong Replacement

- 30 amp replacement cord with 3 wire pigtail provides a new power...
- Outdoor rated RV power cable has a 10/3 STW rating with 3-wire 10...
- Heavy duty 10 gauge RV CORD is rated for 30 amps and up to 120...
- Rugged & safe 3 prong 30 amp RV Cord with a NEMA TT30P power plug...
- Lifetime warranty and product support provides peace of mind when...
True to its name, cable matters, and you want to use the most secure option when it comes down to it. Cable Matters offers you well-jacketed cables, with the individual wires well insulated to avoid contact. The 10-gauge copper wires are weather resistant and flexible, making them more durable as they will not break prematurely. You can count on the cables to last you the longest time without you having to replace the cables every few months.
Each wire is color-coded to help you know the correct ones to connect where. You will not confuse the cables, avoiding accidents as you go about your connections. The cable comes with a three-prong male plug that will make it easier for you to plug and play. You will not take forever looking for the right plug to use on your RV.
Pros:
Cons:
iii) Surge Protector
POWSAF Rv Surge Protector

- 30 amp Surge Protector for RV and Travel Trailer: Identifies...
- Power Watch Dog: Diagnostic LED, Provides fault indication when...
- Designed with Easy To Use Handles: Contoured grips make plugging...
- Reliable Surge Protector Circuit: 3 level complementary Surge...
- Our After Sale Service: Our friendly and reliable customer...
Your RV has systems and appliances rated to handle only a certain amount of voltage. We are looking at 30 amp RV plugs for your RV, meaning we do not want to be dealing with anything more than that. However, there are power surges sometimes. The one sure way to catch the excess power before it damages anything is by using a surge protector. Luckily, we have found the best option for you.
The POWSAF surge protector is an efficient accessory that you will need for your RV. The surge protector will absorb up to 4100 joules. This feature is enough to keep your appliances safe and sound.
Pros:
Cons:
iv) Extension Cord
Camco 50' Heavy Duty Extension Cord

- 30 Amp RV Extension Cord: Has a a standard 30-amp male (NEMA...
- Safe and Durable: 30-amp RV cord has copper wiring coated with a...
- Hassle-Free PowerGrip Plug: Patented handle lets you safely and...
- Multiple Uses: RV power cord is compatible with most vehicles;...
- Quality Products: Camco makes quality products for RVing,...
One of the worries you will have is voltage drop when trying to get power to your RV. The Camco heavy-duty extension cord is made to avoid such inconveniences. You can be sure that the extension cord will get you the required voltage without any losses.
You no longer worry about how far the service panel is because the cord is 50 feet long, giving you enough wire length to cover the required distance. The power cord has a grip handle that will make handling the cable a breeze. The heads are 90-degrees, reducing the stress on the heads caused by bending. As a result, you can be assured of the cable lasting you a long time.
Pros:
Cons:
v) Best outlet box
Miady Outlet Box

- 【ETL LISTED】: 30 A power outlet, NEMA TT-30 receptacle 125V...
- 【BEST SPACE DESIGN】: There is enough space to close and lock...
- 【HEAVY DUTY BOX EASY TO INSTALL & WIRE】: It is recommended...
- 【LOCKABLE & WEATHERPROOF】: High-quality box perfectly...
- 【WHAT YOU GET】: 30 Amp RV Power Outlet with HEAVY DUTY box -...
The outlet box plays a vital role in the electrical signal path that will power your RV. Getting the right outlet box ensures that everything flows smoothly every time you make a connection. Miady assures you of safety through the whole process. The box has a lockable panel that makes the whole system weatherproof. You do not have to worry about rain or the sun shortening the lifespan of the whole system.
Miady is tested and tried, and the results are impressive all the time. The box is easy to install and wire without a certified electrician. However, we highly advise that you always get a certified electrician for such connections.
Pros:
Cons:
Final Take
Your RV requires constant power to run smoothly and efficiently. Likewise, the built-in systems and appliances need electricity to run properly. If you are going to be living or spending a lot of time in the RV, you better get the best 30 amp RV plug wiring system that will work for you. To protect your RV and the appliances therein, it is best to be cautious in every step of the process. Be smart about your choices for your RV, and you will enjoy spending time in it.
Frequently Asked Questions
A) Why Are Wires Differently Colored?
When you look at wires connected in any electrical panel, appliance or gadget, you will notice that they are differently colored. The colors are there to symbolize the functions of each of the wires. For example, an RV outlet will only work properly if the wires are connected to the right places. Therefore, the 30 amp RV outlet cables have three differently colored cables, each meant for a different purpose.
You will see a black, green and white cable. The black cable in the extension cord is the hot wire or the live wire. The green cable is the ground wire, and the white cable is the neutral wire. In some cases, you will see a red wire. The red color is sometimes swapped with the black color. A red wire is a hot wire. The red or black wire is meant to supply power or the live power to the designated place.
B) What Is A Circuit Breaker, And Which One Do I Need?
Once you have connected your electrical systems successfully, you need to protect the appliances connected to your RV. A circuit breaker cuts the flow when there is too much electricity coming into the system. The breaker ensures that everything is protected from damage by short-circuiting or any other forms of damage. For example, an electrical surge can lead to fires and damage to appliances and other materials. The main breaker also comes in handy when making the connections, as you will use it to shut down the electrical panel to avoid contact with any live wires.
Is that being said, which circuit breaker do you need for your RV? Once you have established the amount of electricity in amperes that your RV uses, you can easily pick the appropriate breaker to use. For example, if you are using a 30 amp RV outlet, you need a 30 amp breaker. When buying a new breaker, ensure you buy the correct one for your RV. Once you buy the new breaker, ensure you connect it correctly, and the surge protector will do its job.
The wires in the extension cord are matched in the same colors as the terminals in the circuit breaker. Therefore, the double pole breaker will have an extra terminal that you do not have to use. Instead, just use the appropriate terminals in the circuit breaker.
B) How Far Should The Extension Cord Run?
When getting power to the RV outlet, you need to get it somewhere. You will be using an extension cord to help get the power to your RV. However, if the power source is far away, you can use a thick wire if you are unsure what size wire to use. A heavier gauge wire will be more appropriate to help you get the job done. If the RVoutlet's distance is not very far, a 10-gauge wire will do just fine. However, if the distance to the RV outlet is more than 150-feet away, you might need an 8-gauge or thicker wire to get the power efficiently.
A licensed electrician can help you decide when you suspect you will be getting from long distances. Remember to get power cords and plugs compatible with your power source. If you use a gfci outlet, get the male end that will fit. The basic plugs used for the RV outlet are universal, and you do not have to worry much about it. Just ensure the male and female end are compatible with the specific panel you will be using. Remember what the three wires stand for and where they go.